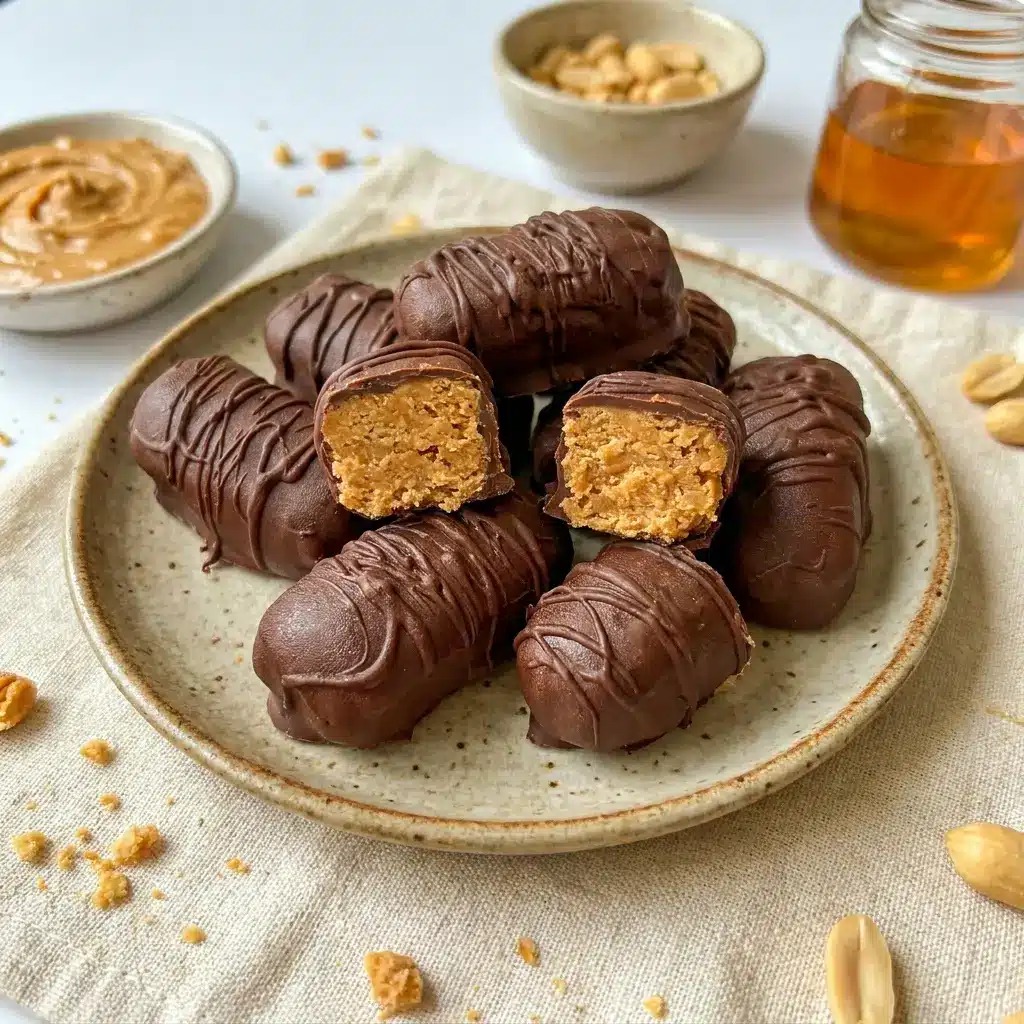
Healthy Homemade Butterfingers bring that old-school candy-bar feeling back in a fresher, cleaner way. The crunch, the peanut butter, the chocolate shell, the sweet-salty bite — it all lands in one ridiculously satisfying treat.
These Healthy Homemade Butterfingers taste like nostalgia with a better ingredient list. They deliver everything people love about the classic candy, but without corn syrup, without the mystery additives, and without the long store-bought label that makes you squint twice before you even take a bite.
I love recipes like this because they hit three sweet spots at once: they feel special, they come together fast, and they taste like a little win. Healthy Homemade Butterfingers check every box. They work as a weekday treat, a party platter add-on, a lunchbox surprise, or a stash of Diy Sweet Snacks you keep in the freezer for those random “I need something sweet right now” moments.
They also fit beautifully into Low Fat Healthy Desserts, Healthy Treats For Adults, and Simple Healthy Sweets because they look indulgent but stay simple enough to make on repeat. And honestly, that is part of the magic. You get the candy bar nostalgia, but you make it at home with ingredients you recognize.
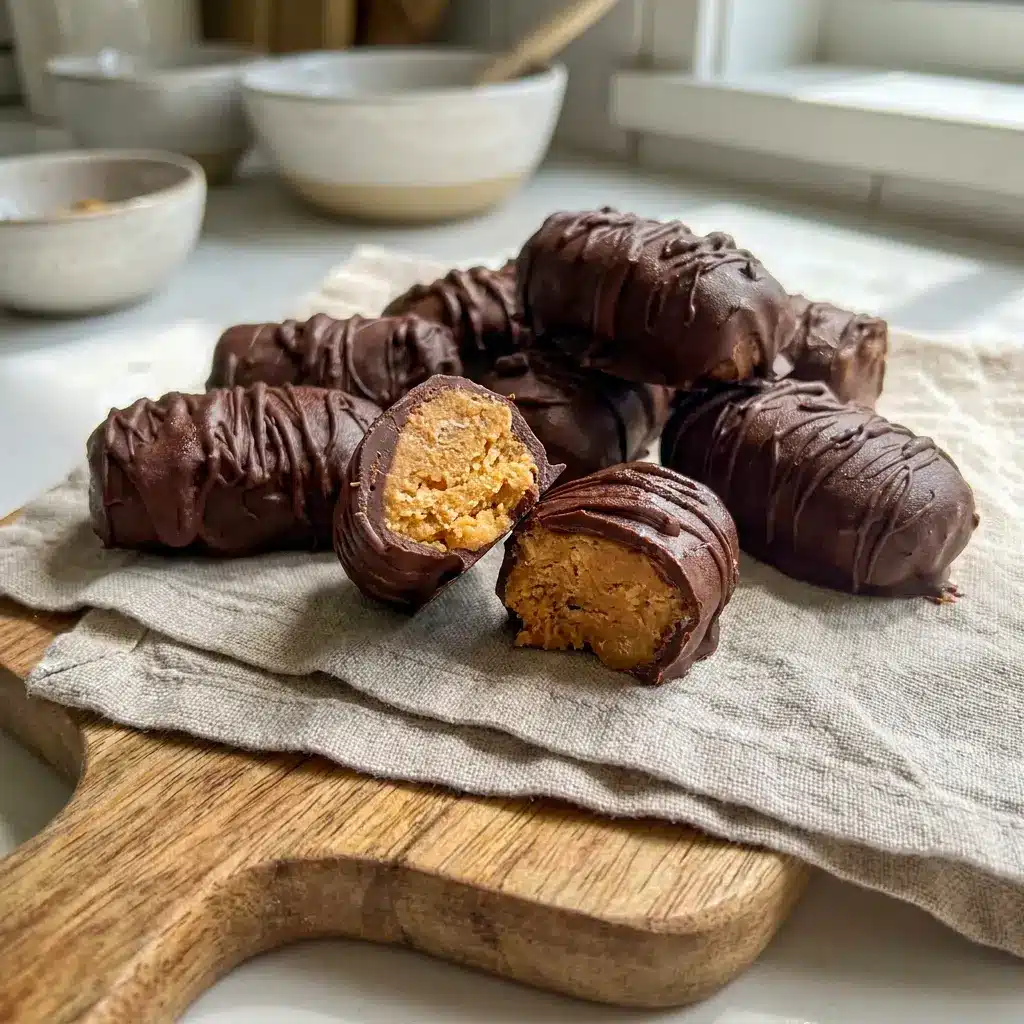
The first bite does a lot of heavy lifting here. The filling turns crunchy and lightly salty, the honey adds a smooth sweetness, and the chocolate shell locks everything together with that classic snap. These are the kind of Healthy Butterfingers that disappear faster than you expect.
For anyone who loves Butterfinger Homemade desserts, this recipe lands right in the sweet spot. It feels playful, familiar, and just a little bit addictive. That is exactly why I keep calling these Healthy Homemade Butterfingers my new favorite dessert to keep on hand.
And yes, they absolutely work for get-togethers. These make fantastic Fun Snack Ideas For Adults because they bring that “just one more” energy to a dessert tray without requiring a complicated bake or a long prep session. They also slide right into holiday boxes, neighbor gifts, and party platters without any effort.
You can even file them under Healthy Yummy Deserts and Dairy Free Sweet Snacks because they satisfy that dessert craving while still feeling lighter than the usual candy aisle options. That combination makes Healthy Homemade Butterfingers hard to beat.
Table of Contents
Why Healthy Homemade Butterfingers Work So Well
Healthy Homemade Butterfingers do a lot with very little. That is the real reason they stand out. Seven simple ingredients, one quick chocolate dip, and you end up with something that tastes far more impressive than the effort required.
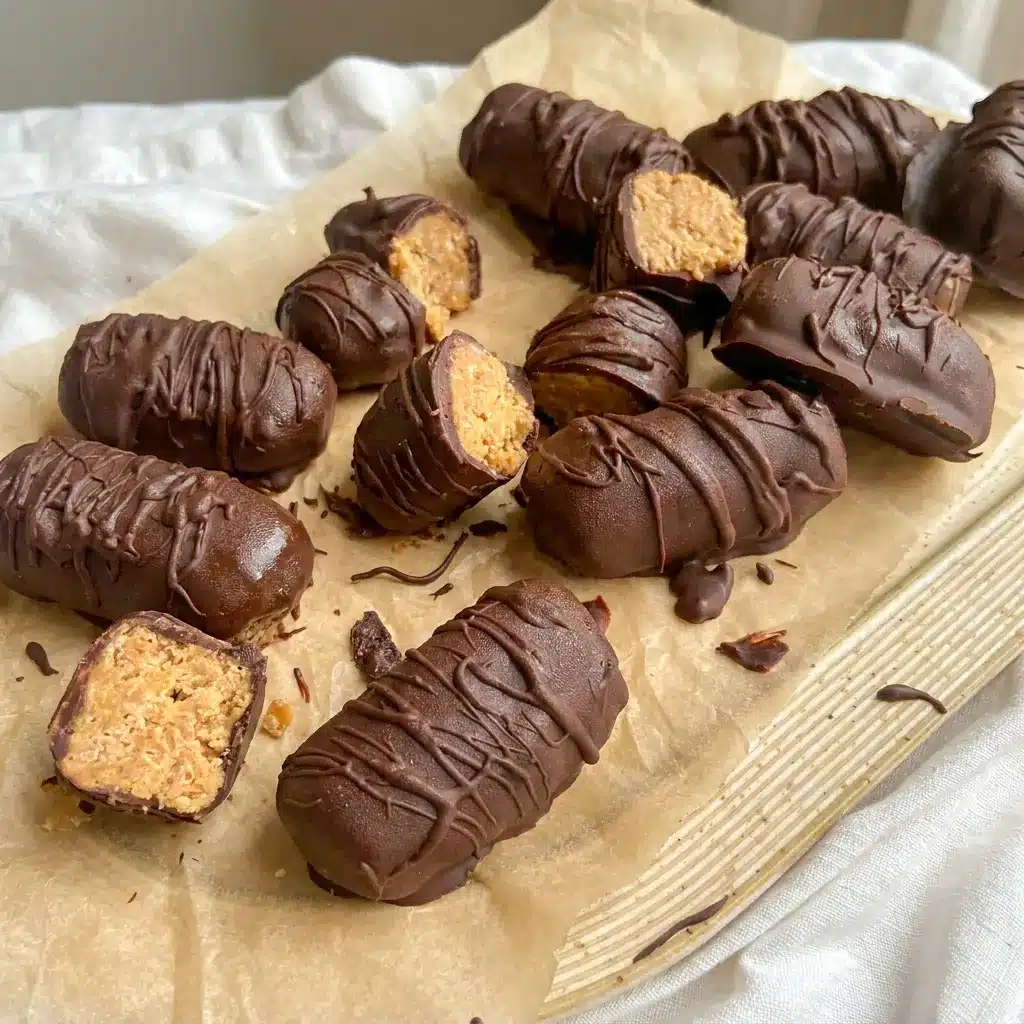
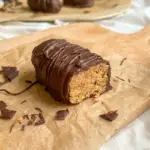
The texture matters most here. Healthy Homemade Butterfingers give you a soft, chewy center with enough cereal crunch to mimic the classic candy bar feel. Do not overthink the shaping or the coating. A slightly rustic log looks charming and tastes even better.
Another reason people love Healthy Homemade Butterfingers is the balance. The peanut butter brings richness, the honey keeps things naturally sweet, the salt sharpens every flavor, and the chocolate seals the deal. That sweet-salty contrast makes every bite feel complete.
These are also the kind of Diy Sweet Snacks that make you feel clever. You take a few pantry staples and turn them into something that looks like a specialty dessert. That kind of kitchen win never gets old.
And because Healthy Homemade Butterfingers are gluten free and dairy free, they work well for mixed crowds too. When you need one dessert that can sit happily on the table and still suit different eaters, this recipe delivers.
The Key Ingredients (and Why You Need Them)
Below I list the main ingredients without the measurements — the printable recipe card has all of those details. Here, I want to show you what each ingredient does so you can understand the structure of the recipe and make smart swaps when needed.
- Peanut butter: This creates the rich base of the filling and gives Healthy Homemade Butterfingers their signature nutty flavor. Use a creamy version for the smoothest texture.
- Honey: Honey sweetens the filling and helps bind everything together. It also gives Healthy Homemade Butterfingers that slightly chewy, candy-like feel.
- Vanilla extract: A little vanilla rounds out the sweetness and deepens the flavor so the filling tastes warm and balanced.
- Sea salt: Salt wakes up the peanut butter and keeps the dessert from tasting flat. The salty edge is part of what makes Healthy Homemade Butterfingers so craveable.
- Cornflake-style cereal: This brings the crunch. It gives the filling that classic candy-bar texture and helps the logs hold their shape.
- Chocolate chips: These make the shell. They add the chocolate coating that turns Healthy Homemade Butterfingers into something truly dessert-worthy.
- Coconut oil: A small amount helps the chocolate melt smoothly and set with a glossy finish. It also makes dipping easier.
If you like using pantry recipes for quick treats, this ingredient list will make you happy. Healthy Homemade Butterfingers rely on simple building blocks, and that keeps the whole process easy enough for busy days.
How to Make It
Healthy Homemade Butterfingers come together in a few straightforward steps. You do not need special equipment, and you do not need candy-making experience. Just move through the process in order and let the freezer do some of the work.
- Warm the filling base.
Add the peanut butter, honey, vanilla, and sea salt to a saucepan set over medium-low heat. Stir as the mixture warms. Keep the heat gentle and steady for about 2 to 4 minutes, just until everything looks smooth, glossy, and fully combined. - Add the cereal.
Transfer the warm peanut butter mixture to a large mixing bowl with the cereal. Stir thoroughly until every piece gets coated. As you mix, lightly crush some of the cereal so the filling clumps together and forms that classic crunchy candy texture. - Shape the logs.
Scoop the mixture and form it into short logs. You should get about 12 to 14 pieces. Place each one on a parchment-lined plate or baking sheet. Keep the shape compact so the bars hold together well later. - Freeze until firm.
Put the shaped logs in the freezer for about 1 hour. This step matters because it helps the bars firm up enough for dipping. Healthy Homemade Butterfingers hold their shape best when they are cold and solid. - Melt the chocolate.
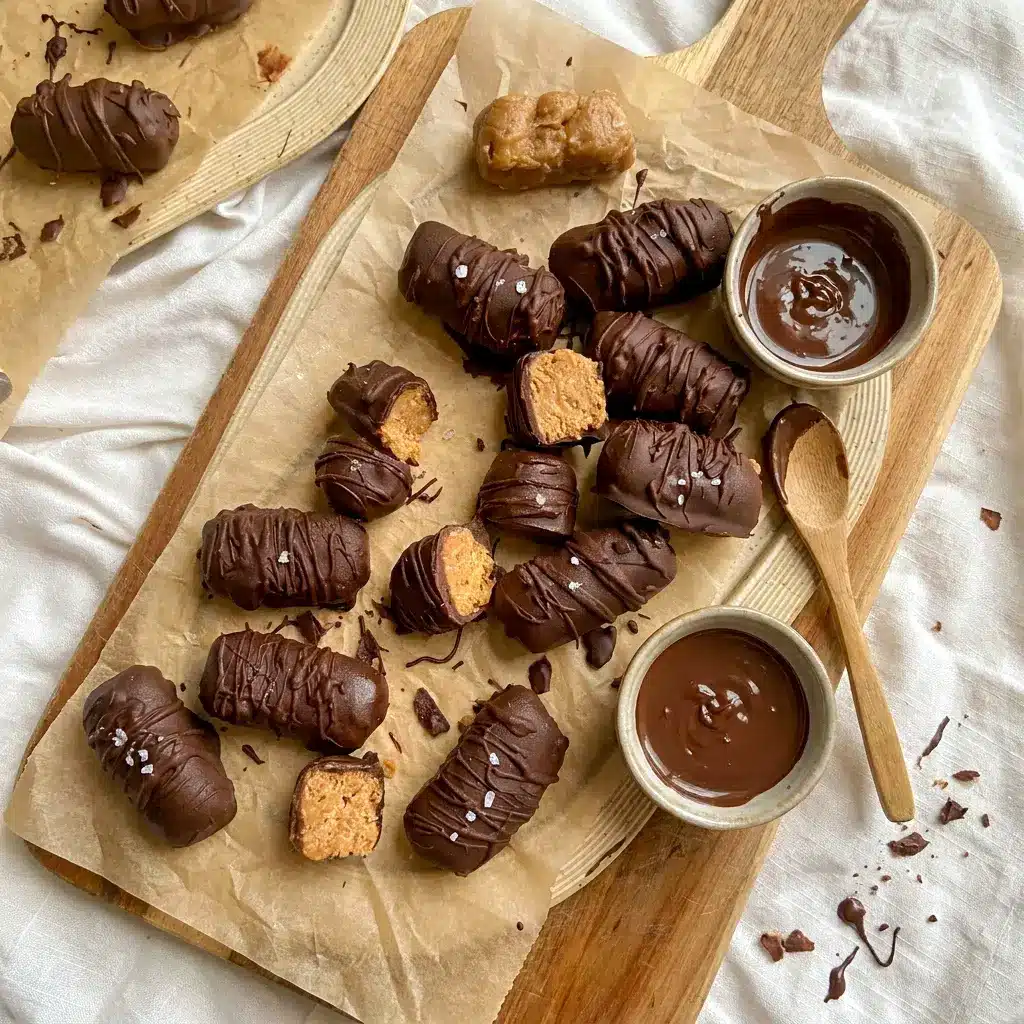
Add the chocolate chips and coconut oil to a microwave-safe bowl or a small saucepan. Melt gently, stirring often, until smooth. If you use the microwave, heat in short bursts so the chocolate does not scorch. - Dip the bars.
Remove the chilled logs from the freezer. Dip each one into the melted chocolate, turning to coat it evenly. Let the excess drip off before you place it back on the parchment. - Set the coating.
Return the coated bars to the freezer for about 10 minutes, or until the chocolate firms up. After that, Healthy Homemade Butterfingers are ready to eat, share, or store.
Pro Tips for Perfect Healthy Homemade Butterfingers
Healthy Homemade Butterfingers are easy, but a few smart details make them even better.
- Use a gentle heat. Peanut butter can tighten or separate if you rush it. Low and slow keeps the filling smooth.
- Do not crush the cereal too much. A little breakage helps the mixture bind, but you still want crunchy bits for texture.
- Shape the logs firmly. Press the mixture together well so the bars hold their form after freezing.
- Chill before dipping. Cold logs stay intact much better when they hit the warm chocolate.
- Work quickly with the chocolate. Once melted, dip the bars before the coating thickens too much.
- Line everything with parchment. This keeps the bars from sticking and makes cleanup easy.
- Keep the chocolate layer thin. A light coating gives Healthy Homemade Butterfingers a cleaner snap and keeps the sweet balance on point.
That last tip matters more than people think. A thick chocolate shell can overpower the filling. A thinner coat keeps the texture balanced and lets the peanut butter crunch shine through.
Easy Variations to Try
Healthy Homemade Butterfingers already taste amazing as written, but small changes can make them feel new again.
- Swap the nut butter for almond butter or sunflower seed butter if you need a different flavor profile.
- Use dark chocolate for a more intense finish and a slightly less sweet bite.
- Add extra salt on top before the chocolate sets for a sweet-salty finish.
- Mix in crushed pretzels for a louder crunch and a more snacky feel.
- Drizzle white chocolate over the top once the coating sets for a prettier presentation.
- Make bite-size pieces instead of logs for party trays and lunchbox treats.
These versions still keep the spirit of Healthy Homemade Butterfingers alive, but they let you play with the flavor a little. That flexibility makes the recipe repeat-friendly.
Best Ways to Serve Healthy Homemade Butterfingers
Healthy Homemade Butterfingers shine in a lot of different settings. They feel casual enough for a Tuesday afternoon and polished enough for a dessert spread.
Try serving them:
- after dinner with coffee or tea
- on a holiday cookie tray
- in a dessert box for gifting
- as a freezer treat for after-school snacking
- on a party platter alongside fruit and other sweets
- chopped over vanilla ice cream for a candy-inspired topping
Healthy Homemade Butterfingers also make a smart make-ahead dessert because you can store them cold and bring them out only when you need them. That convenience is part of the appeal.
When I want something that feels fun but not fussy, Healthy Homemade Butterfingers are exactly the kind of treat I reach for. They hit that sweet spot between homemade charm and candy-bar nostalgia.
Storage and Leftovers
Healthy Homemade Butterfingers keep well, which makes them ideal for batching ahead.
- Refrigerator: Store them in an airtight container for several days. The chocolate stays firm, and the filling keeps its shape.
- Freezer: Keep them frozen for longer storage. This is my favorite option because the texture holds beautifully, and the bars taste great straight from the freezer or after a short thaw.
- Layering tip: If you stack them, separate layers with parchment paper so the chocolate does not stick together.
These are the kind of Healthy Homemade Butterfingers that make leftovers feel like a win rather than an afterthought. In fact, a cold one straight from the freezer tastes almost like a candy bar truffle.
FAQs
Are Healthy Homemade Butterfingers really gluten free?
Yes, as long as you use a gluten-free cornflake-style cereal. That one detail keeps Healthy Homemade Butterfingers in gluten-free territory.
Can I make Healthy Homemade Butterfingers dairy free?
Absolutely. Use dairy-free chocolate chips, and the recipe stays firmly in Dairy Free Sweet Snacks territory.
Do Healthy Homemade Butterfingers need to stay refrigerated?
They keep best in the fridge or freezer. Because of the chocolate coating and soft filling, cold storage helps them stay firm and fresh.
Can I make them ahead for a party?
Yes, and that is one of the best things about Healthy Homemade Butterfingers. Make them in advance, chill them well, and pull them out when guests arrive.
Why do my Healthy Homemade Butterfingers feel soft?
That usually means they need more freezer time or a little more cereal for structure. The mixture should be thick enough to hold its shape before you form the logs.
Final Thoughts
Healthy Homemade Butterfingers prove that a nostalgic candy can taste amazing without a complicated recipe. They bring the crunch, the chocolate, the peanut butter, and the sweet-salty payoff in a way that feels fun and doable.
I love how Healthy Homemade Butterfingers fit so many moments: late-night cravings, party trays, holiday dessert boards, lunchbox surprises, and freezer snacks you keep for yourself. They are quick, playful, and deeply satisfying.
When you want Simple Healthy Sweets that still feel like a treat, Healthy Homemade Butterfingers deliver. When you need Healthy Treats For Adults that feel special but not overdone, Healthy Homemade Butterfingers deliver again. And when you want a better-for-you candy remake that still scratches the craving, Healthy Homemade Butterfingers absolutely show up.
Make a batch once, then watch how fast they disappear. That crunchy peanut butter center and chocolate shell have a way of winning people over immediately. Healthy Homemade Butterfingers are the kind of dessert that turns a regular day into something a little more fun.
Follow me on Pinterest for daily new recipes.
Healthy Homemade Butterfingers | Easy Gluten-Free & Dairy-Free Candy Bites
A crunchy, chocolate-dipped candy bar remake made with simple pantry ingredients, bold peanut butter flavor, and a sweet-salty finish. These bars taste nostalgic, look impressive, and store beautifully in the fridge or freezer.
- Prep Time: 10 minutes
- Freeze Time: 1 hour
- Total Time: 1 hour 10 minutes
- Yield: 12 butterfingers 1x
- Category: Dessert
Ingredients
- 1 cup peanut butter
- 1/3 cup honey
- 1/2 tsp vanilla extract
- 1/2 tsp sea salt
- 1 + 3/4 cup cornflake cereal
- 1 cup chocolate chips (dairy free, if needed)
- 1 tsp coconut oil
Instructions
- Gently warm the filling ingredients.
Set a saucepan over medium-low heat and add the peanut butter, honey, vanilla extract, and sea salt. Stir constantly as the mixture heats. Let it warm for about 2 to 4 minutes, just until it loosens up, looks smooth, and blends together easily. Keep the heat low enough that the mixture never scorches or bubbles aggressively. - Combine the cereal with the peanut butter mixture.
Place the cornflake cereal in a large mixing bowl. Pour the warm peanut butter mixture over the cereal, then stir until the cereal gets coated all over. As you stir, lightly press and crush some of the cereal with your spoon or spatula. That helps the mixture stick together and gives the bars their signature candy-bar texture. - Shape the mixture into logs.
Scoop up portions of the mixture and form them into short, log-like bars. Aim for about 12 to 14 logs total. Try to keep the pieces similar in size so they freeze and coat evenly later. Once shaped, arrange them on a plate or baking sheet lined with parchment paper. - Freeze until firm.
Transfer the tray or plate to the freezer and let the logs chill for about 1 hour. This step is important because it firms up the centers and makes dipping much easier. The bars should feel solid enough to handle without falling apart. - Melt the chocolate coating.
Add the chocolate chips and coconut oil to a microwave-safe bowl or a saucepan. Melt them slowly, stirring often, until the mixture turns smooth and glossy. If you use the microwave, heat in short intervals and stir between each one so the chocolate does not overheat or seize. - Dip each bar in chocolate.
Remove the frozen logs from the freezer one at a time. Dip each one into the melted chocolate and turn it until fully coated. Let any extra chocolate drip back into the bowl before placing the bar back onto the parchment-lined tray. Work steadily so the bars stay cold and firm while you coat them. - Let the coating set.
Once all the bars are dipped, return the tray to the freezer for about 10 minutes, or until the chocolate hardens. After that, the bars are ready to enjoy. Store them in the refrigerator or freezer for the best texture and freshness.