Easy Homemade Nutella Recipe for Healthy Snacks and Sweet Spreads
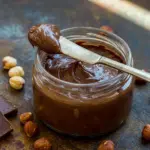
This Homemade Nutella recipe gives you a silky, chocolate-hazelnut spread with a simple ingredient list and a deep, roasted flavor. It works beautifully as a sweet spread, a dip, or a quick homemade treat you can keep on hand for everyday snacking.
- Prep Time: 7 minutes
- Cook Time: 8 minutes
- Total Time: 15 minutes
- Yield: 2 cups 1x
- Category: Dessert
Ingredients
Scale
- 2 cups hazelnuts
- 1/4 tsp pure vanilla extract
- 1/4 cup cocoa powder
- 1/3 cup sweetener of choice
- 1/4 tsp salt
- 1/2 cup milk of choice or 2 tbsp oil, optional
Instructions
- Begin by checking the hazelnuts. If they are already roasted, you can move ahead. If they are raw, set your oven to 400°F and line a baking sheet with parchment paper. Spread the hazelnuts out in a single layer and roast them for 6 to 8 minutes, just until they start to deepen in color and release a toasty aroma. Keep a close eye on them because nuts can go from perfectly roasted to too dark very quickly. Roasting gives Homemade Nutella that richer, more classic flavor, so do not skip this step unless your nuts are already roasted.
- Once the nuts come out of the oven, let them cool just enough to handle. Transfer them to a clean kitchen towel or a sturdy paper towel and rub them together to loosen the skins. Some skins will fall off easily, while others may cling stubbornly to the nuts. That is completely fine. You do not need every last bit removed for Homemade Nutella to turn out well. The goal is simply to remove most of the loose skin so the texture stays smoother and the flavor tastes cleaner.
- Add the hazelnuts to a high-speed blender or food processor. Blend them on high until they break down into a thick nut butter. At first, the mixture will look dry and crumbly. Keep going. Then it will start clumping together. After that, the natural oils in the nuts will release and the mixture will become shiny, creamy, and much more fluid. This can happen fairly quickly in a powerful blender, but it may take up to twenty minutes in a food processor, depending on the machine. Scrape down the sides as needed so every bit gets processed evenly. This stage is the foundation of a good batch of Homemade Nutella.
- When the hazelnuts have fully turned into butter, add the cocoa powder, sweetener, vanilla extract, and salt. Blend again until the color turns deep brown and the mixture looks evenly combined. Pause to scrape the sides if necessary so no dry pockets remain. The cocoa should disappear into the hazelnut base, and the vanilla should round out the flavor. At this stage, Homemade Nutella should already smell rich and chocolatey.
- Check the texture. If you want a thicker spread, leave it as it is. If you prefer a softer, more spoonable or drizzle-friendly consistency, add the milk or oil a little at a time. Blend after each addition so you can judge the texture before adding more. The milk creates a softer finish, while oil helps loosen the spread while keeping it smooth. Either option works well in Homemade Nutella, so choose the one that best matches how you plan to use it.
- Taste the spread and make any final adjustments. Add a little more sweetener if the chocolate flavor feels too bold, or a tiny pinch more salt if the sweetness needs balancing. Blend again briefly after each adjustment. This final tasting step matters because cocoa powders and sweeteners vary, and the best batch of Homemade Nutella is the one that suits your own taste.
- Once the spread reaches the texture and flavor you want, transfer it to a clean jar or airtight container. Let it cool completely before sealing if it is still warm from blending. Store it based on whether you used milk or oil, following the storage guidance above. After that, your Homemade Nutella is ready for toast, fruit, biscuits, or straight-from-the-jar spoonfuls.
Notes
- If you use oil instead of milk, the spread can stay in the pantry in a tightly covered container for a short period, or in the refrigerator for longer storage.
- If you use milk, refrigerate the spread and use it within a couple of weeks for the best texture and freshness.
- For the smoothest result, a high-speed blender works best, though a food processor still gets the job done with more time.
- You can use roasted hazelnuts to save time and skip the oven step.
- The recipe also works with almonds if hazelnuts are unavailable, though the flavor will be different.
Find it online: https://irmacooks.com/easy-homemade-nutella-recipe/
