Strawberry Pop Tart Cookie Bars Recipe | Easy Chewy Dessert Bars
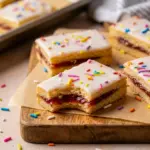
These Pop Tart Cookie Bars pack all the cozy strawberry flavor of a classic toaster pastry into a soft, chewy cookie bar. The buttery sugar cookie layers sandwich a sweet strawberry filling, and the whole tray finishes with vanilla glaze and rainbow sprinkles for a fun, nostalgic dessert everyone will want a piece of.
- Prep Time: 2 hours
- Cook Time: 25 minutes
- Total Time: 2 hours 25 minutes
- Yield: 15 servings 1x
- Category: Dessert
Ingredients
Scale
For the Sugar Cookie Dough
- 1/2 cup unsalted butter, at room temperature
- 1 cup granulated sugar
- 2 large eggs, at room temperature
- 1 teaspoon vanilla extract or vanilla bean paste
- 2 1/2 cups + 2 tablespoons all-purpose flour
- 1/2 teaspoon fine sea salt
- 1/2 teaspoon baking soda
- 2/3 cup strawberry preserves
For the Glaze
- 1 cup powdered sugar
- 1 1/2 to 2 tablespoons whole milk
- 1/2 teaspoon vanilla extract
- Rainbow sprinkles, for finishing
Instructions
- Prepare the pan and oven
Line a square metal 8×8 baking pan with parchment paper so the paper extends over all four sides. Heat the oven to 375°F / 190°C and set the pan aside. - Cream the butter and sugar
Place the softened butter and granulated sugar into the bowl of a stand mixer. Beat on medium speed for about 3 minutes, or until the mixture looks lighter in color and fluffy in texture. Scrape down the sides and bottom of the bowl so everything blends evenly. - Add the eggs and vanilla
Add the eggs one at a time, mixing well after each addition. Pour in the vanilla extract or vanilla bean paste and mix only until combined. Scrape the bowl again so the dough stays even. - Add the dry ingredients
Add the flour, salt, and baking soda to the bowl. Mix on low speed just until the dough starts to pull together and form soft clumps. Stop as soon as the ingredients combine so the bars stay tender. - Chill the dough
Cover the bowl with plastic wrap and place it in the refrigerator for 20 minutes. This brief chill firms the dough and makes it much easier to spread and layer. - Form the first dough layer
Scoop out half of the dough and press it into the prepared pan. Aim for an even layer that covers the bottom of the pan. Use about 348 g of dough for this first layer. Once pressed in, lift the parchment out of the pan and move that layer to a baking sheet. Place it in the freezer while you finish the rest. - Reset the pan
Put fresh parchment strips back into the pan so all four sides are covered again. This keeps the pan easy to lift later and helps with clean removal. - Add the second dough layer
Press the remaining cookie dough into the lined pan and spread it evenly across the bottom. Work gently and keep the layer as uniform as you can. - Spread on the strawberry preserves
Spoon the strawberry preserves over the dough and smooth them into an even layer with an offset spatula or the back of a spoon. Make sure the jam reaches close to the edges for a full, fruity center. - Add the frozen dough top
Remove the chilled dough slab from the freezer. Peel away the parchment paper and carefully place the slab on top of the strawberry layer. Press it down firmly so it adheres to the filling. A little jam may squeeze out around the edges, and that is perfectly fine. - Bake the bars
Transfer the pan to the preheated oven and bake for 25 to 28 minutes, or until the top turns golden brown and the bars look set. The edges should look lightly browned and the center should no longer appear raw. - Cool completely
Place the pan on a wire cooling rack and let the bars cool all the way to room temperature. Do not rush this step. The bars need to firm up before you remove them from the pan. - Invert the bars
Once the bars are fully cooled, use the parchment overhang to lift them out of the pan. Turn them upside down so the bottom becomes the top. Set them on a cutting board or clean work surface. - Make the glaze
In a small bowl, whisk together the powdered sugar, whole milk, and vanilla extract until smooth and thick but pourable. Add a little more milk if needed, just a tiny splash at a time, until the glaze spreads easily. - Finish with glaze and sprinkles
Pour the glaze over the top of the bars and spread it into an even layer. Immediately shower the surface with rainbow sprinkles before the glaze begins to set. - Let the glaze set
Leave the bars at room temperature for 1 to 2 hours, or until the glaze firms up. Once set, slice into 15 bars and serve.
Notes
- Measure the flour carefully. Spoon it into the measuring cup and level it off, or use a scale for the most accurate result. Scooping directly from the bag can pack in too much flour and make the bars dry.
- Use a square metal 8×8 pan. A metal pan with sharp corners gives the best texture. Glass, ceramic, or rounded-edge pans can change the baking time and may create a cakier result.
- Let the glaze fully set before cutting. Humid weather can slow this down, so be patient. Do not freeze the bars to speed things up, since that can make the glaze wrinkle.
- Swap the preserves if you like. Strawberry gives the classic flavor, but grape, blueberry, blackberry, or raspberry all work well.
- Keep your hands clean while pressing the dough. The dough may feel sticky, so clean hands help you spread it more easily.
Find it online: https://irmacooks.com/strawberry-pop-tart-cookie-bars/
