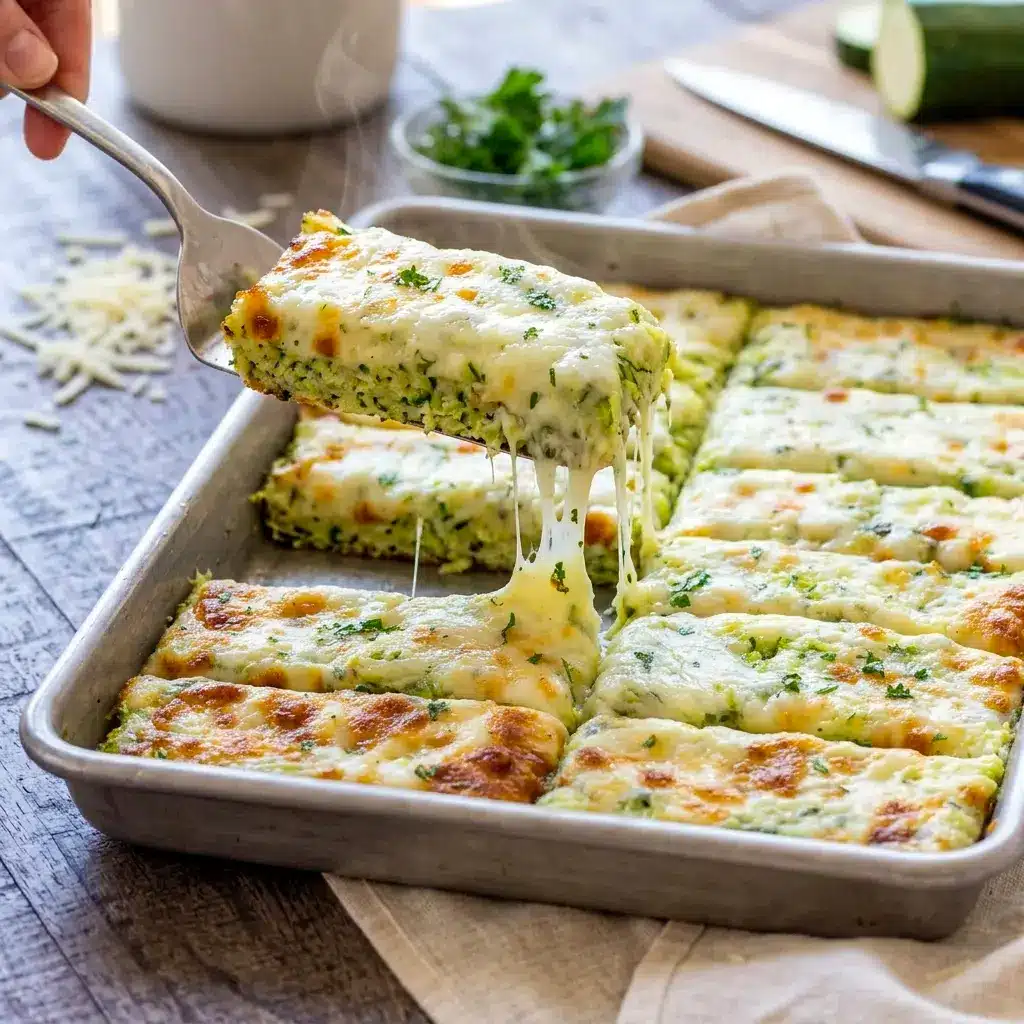
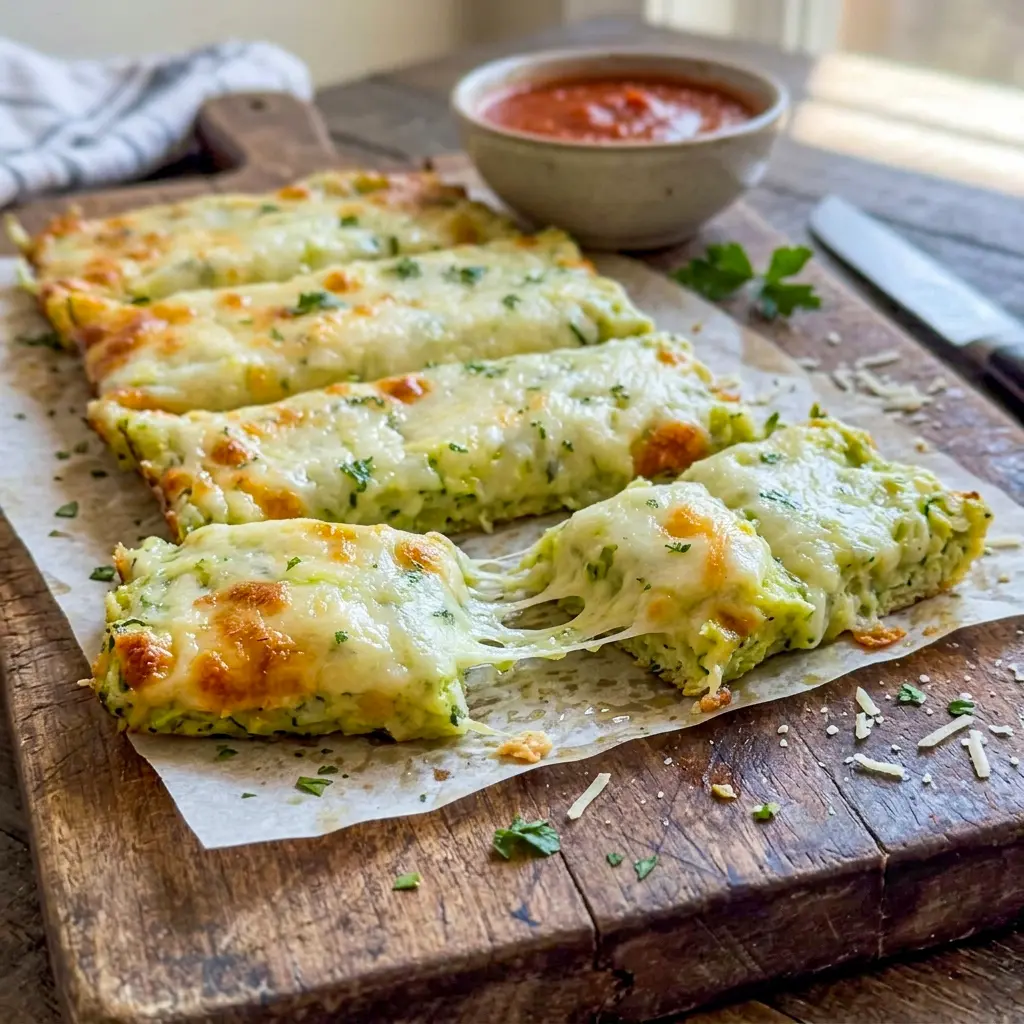
Cheesy Zucchini Breadsticks have officially earned a permanent spot in my kitchen, especially on those days when I want something warm, cheesy, and comforting without making a traditional loaf of bread. They’re crisp around the edges, tender in the middle, loaded with savory cheese, and surprisingly satisfying for something built around zucchini.
And yes, there’s a vegetable hiding in there.
That feels like a pretty good kitchen win.
For years, zucchini has been one of those vegetables I’ve had in abundance thanks to my mother’s garden. She grows it with impressive enthusiasm, which means the family gets the delicious job of figuring out what to do with all of it. After enough sautéed zucchini, roasted zucchini, and zucchini added to basically everything imaginable, I started experimenting with ways to turn it into something completely different.
That experiment became these Cheesy Zucchini Breadsticks.
Instead of flour-based dough, this recipe combines grated zucchini, eggs, mozzarella, Parmesan, and seasoning. Once the mixture bakes, it transforms into a savory crust that you can slice into breadsticks and top with even more melted cheese.
It’s simple. It’s cheesy. It’s low-carb friendly. And honestly, it disappears much faster than I ever expect.
Table of Contents
Why You’ll Love These Cheesy Zucchini Breadsticks
There are plenty of reasons this recipe keeps coming back into my meal rotation.
First, you don’t need flour to make a satisfying breadstick-style snack. The zucchini and cheese create a sturdy base that bakes into something sliceable and delicious.
Second, the ingredient list is wonderfully straightforward. You probably recognize everything immediately, and there’s no complicated dough to knead, proof, or babysit.
Third, the texture is much better than you might expect from zucchini. When you squeeze out enough moisture and spread the mixture thinly, the edges become beautifully browned while the center stays tender and cheesy.
And then there’s the topping.
Adding another layer of cheese during the final few minutes of baking turns an already tasty crust into something gloriously golden and bubbly.
These Cheesy Zucchini Breadsticks are also flexible. Serve them beside dinner, dip them in marinara, make them as a snack, or turn the base into a low-carb pizza crust.
That kind of versatility makes this recipe a keeper.
The Key Ingredients (and Why You Need Them)
Here’s a closer look at the main ingredients and what each one contributes. The printable recipe contains the exact amounts, while this section explains why each ingredient matters and where you can make small adjustments.
- Grated zucchini: This forms the foundation of the breadstick mixture. Zucchini brings moisture and structure, but removing excess liquid is absolutely essential for the right texture.
- Mozzarella cheese: Mozzarella gives the crust that stretchy, melty quality you want from a cheesy breadstick.
- Parmesan cheese: Parmesan adds a stronger savory flavor and helps create delicious browned edges.
- Egg: Egg works as a binder, helping hold the zucchini and cheese mixture together as it bakes.
- Garlic parsley salt: This seasons the crust throughout instead of leaving the flavor dependent on the topping alone.
- Shredded cheese for topping: This final layer creates the gooey, golden finish. Mozzarella is a classic choice, but a Mexican-style blend also works beautifully.
The star ingredient is obviously zucchini, but the real trick is what you do with it before it ever reaches the oven.
The Secret to Better Cheesy Zucchini Breadsticks
Let’s talk about moisture because this is where the recipe can either shine or turn soft and floppy.
Zucchini contains a lot of water. That’s fantastic when you want juicy vegetables, but it can work against you when you’re trying to create a crisp, bread-like crust.
So don’t skip the squeezing step.
After grating the zucchini, sprinkle it with a little salt and let it sit for around 10 minutes. This helps draw out even more moisture.
Then transfer the zucchini to a clean kitchen towel and squeeze.
And squeeze again.
You want to remove as much liquid as reasonably possible.
The drier the grated zucchini, the better your crust will bake.
This one small step makes a surprisingly big difference.
How to Make It
Making Cheesy Zucchini Breadsticks is straightforward, but each step matters. Take your time with the moisture removal and the spreading process, and the final texture will reward you.
1. Prepare the zucchini
Start with your grated zucchini.
After grating, sprinkle it with a small amount of salt and let it rest for roughly 10 minutes. The salt helps pull moisture from the zucchini.
Place the grated zucchini into a clean kitchen towel.
Gather the towel around the zucchini and twist or press firmly to extract the liquid. Keep squeezing until very little moisture comes out.
This is not the moment to be gentle.
The goal is to reduce the water content before mixing your crust.
2. Mix the zucchini and cheese
Add the drained zucchini to a mixing bowl.
Add the mozzarella, Parmesan, egg, and garlic parsley salt.
Stir thoroughly until everything is evenly distributed.
You want the zucchini coated with the cheese and seasoning, with the egg helping bind the mixture together.
The mixture may look much looser than traditional bread dough.
That’s completely normal.
You are not trying to create a kneadable dough. Instead, you’re creating a thin vegetable-and-cheese mixture that will firm up in the oven.
3. Prepare the baking sheet
Line your baking dish or baking sheet with parchment paper or use a silicone baking mat.
Transfer the zucchini mixture to the lined surface.
Spread it evenly into a thin layer.
Aim for roughly ½ inch of thickness.
This part matters more than it might seem.
A thick layer traps more moisture and can leave you with a softer, mushier center. A thinner layer gives the heat a better chance to evaporate moisture and crisp the bottom.
Use a spatula or the back of a spoon to spread the mixture evenly from edge to edge.
Try to avoid thick spots because they will bake differently from the thinner sections.
4. Bake the first layer
Place the baking sheet into a hot oven and bake at 425°F for about 15 minutes.
The high temperature is intentional.
Cheesy Zucchini Breadsticks contain more moisture than traditional bread dough, so a hotter oven helps the surface brown while encouraging excess moisture to cook away.
Keep an eye on the edges as they approach the end of the first bake.
You want the crust set and beginning to brown.
5. Add the cheese topping
Remove the baked zucchini crust from the oven.
Sprinkle your choice of shredded cheese evenly over the surface.
Mozzarella works especially well here, but a Mexican cheese blend gives the breadsticks a slightly different flavor and an extra creamy finish.
Return the baking sheet to the oven.
Bake for another 2 to 5 minutes, just until the cheese melts and develops golden-brown spots.
Don’t wander off during this step.
The difference between beautifully melted cheese and overly browned cheese can happen quickly.
6. Slice and serve
Remove the finished crust from the oven and let it sit just long enough to handle safely.
Slice it into breadstick-shaped pieces.
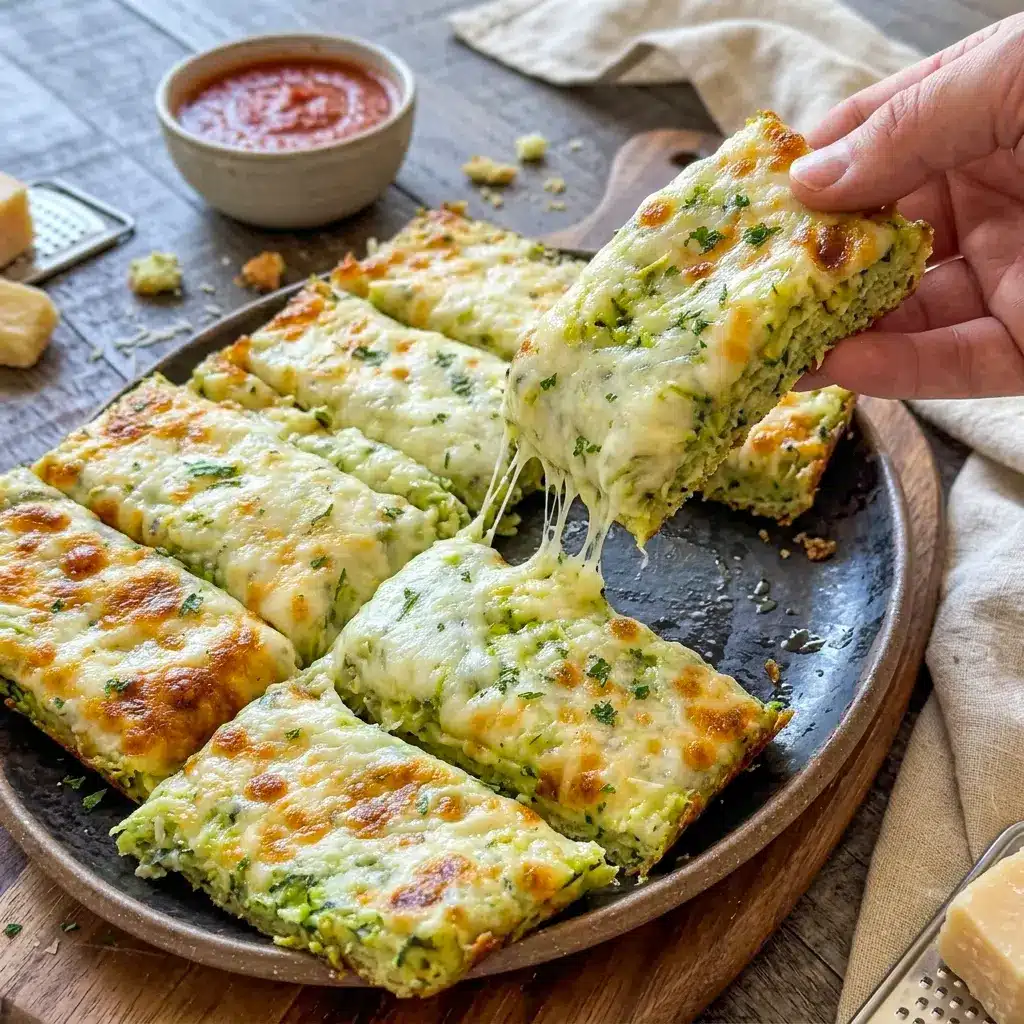
Serve immediately while the cheese is still warm and stretchy.
This is when Cheesy Zucchini Breadsticks are at their absolute best.
Pro Tips for Perfect Cheesy Zucchini Breadsticks
A few small details can make the difference between a decent batch and a fantastic batch.
Squeeze the zucchini aggressively. This remains the most important tip. Excess moisture is the enemy of crispness.
Use enough surface area. A large baking sheet allows you to spread the mixture thinly and evenly. A smaller dish can make the crust too thick.
Keep the layer around ½ inch thick. This helps the bottom brown while preventing the center from becoming overly soft.
Bake hot. The 425°F oven helps the crust develop color and structure.
Grate your own cheese when possible. Freshly grated mozzarella or Parmesan typically melts beautifully and gives the finished breadsticks a better texture.
Watch the second bake carefully. The cheese topping only needs a few minutes to become melted and golden.
Serve them hot. Like many cheese-heavy recipes, Cheesy Zucchini Breadsticks are at their best straight from the oven.
Don’t skip the liner. Parchment paper works well, while a silicone baking mat is especially convenient if you make recipes like this regularly.
Cheesy Garlic Zucchini Bread Variations to Try
Once you have the basic technique down, you can easily change the flavor profile.
For a stronger garlic flavor, add a little additional garlic seasoning to the zucchini mixture.
For a more herb-forward version, add Italian seasoning, dried oregano, or basil.
For extra heat, mix in red pepper flakes or a pinch of cayenne.
For a richer crust, increase the Parmesan component slightly while maintaining the same overall balance.
You can also experiment with different cheeses.
A mozzarella-heavy version keeps things mild and stretchy. A sharper cheese gives the crust more character.
These variations turn the basic recipe into a versatile Zucchini Cheesy Bread that can fit different meals and cravings.
Make a Zucchini Pizza Crust Instead
This recipe has another excellent trick up its sleeve.
Instead of spreading the mixture into a rectangular breadstick shape, form it into a round pizza-style crust.
Bake the crust using the same basic method, then add your favorite toppings.
That simple swap turns the recipe into a homemade pizza base without traditional flour-based dough.
Some combinations I especially like include:
- Chicken, spinach, and a creamy Alfredo sauce
- Blue cheese, uncured bacon, and mushrooms
- Tomato slices, fresh basil, and Italian sausage
- Prosciutto and arugula
- Pepperoni, bell peppers, and olives
The possibilities are almost endless.
When to Serve Cheesy Zucchini Breadsticks
Cheesy Zucchini Breadsticks make an easy side dish for dinner, but they are just as useful outside the dinner table.
Serve them beside grilled chicken, roasted meats, soup, or a big salad.
They also make a fun snack when you want something savory and cheesy without reaching for crackers or traditional bread.
For dipping, marinara is an obvious winner.
A warm bowl of marinara with fresh Cheesy Zucchini Breadsticks practically disappears at my table.
You can also serve them with ranch, garlic butter, or your favorite tomato-based dipping sauce.
Because the flavor is mild enough to complement other foods, these breadsticks work particularly well when you need a versatile side.
Cheesy Zucchini Bread Slices for Meal Prep
While I think these are best served hot, leftovers are still useful.
Once cooled, transfer the Cheesy Zucchini Bread Slices to an airtight container and refrigerate them.
They will keep for up to 3 days.
For the best texture, I recommend reheating them in the oven or air fryer rather than using the microwave.
The microwave heats the cheese quickly but also tends to soften the zucchini crust.
That means you lose some of the crispness that makes the recipe so enjoyable.
How to Store and Reheat Cheesy Zucchini Breadsticks
Storage is easy as long as you manage the moisture.
For refrigeration, place the cooled breadsticks in an airtight container and keep them chilled for up to 3 days.
For reheating, use one of these methods:
- Oven: Place the breadsticks on a baking sheet and heat at 375°F for about 5 to 7 minutes, or until warmed through and crisp again.
- Air fryer: Reheat at 350°F for about 3 to 4 minutes.
I don’t recommend freezing this recipe.
Zucchini naturally contains a lot of water, and freezing followed by thawing can cause the crust to become watery and mushy.
For that reason, Cheesy Zucchini Breadsticks are best made fresh and enjoyed within a few days.
Is This a Keto Zucchini Cheese Bread?
For anyone searching for Keto Zucchini Cheese Bread, this recipe fits the general style of a flourless, zucchini-based cheese breadstick.
The exact nutritional profile will depend on the products and quantities used, so check your ingredient labels when precise nutrition information matters to you.
The biggest appeal is that the recipe replaces conventional flour-based bread with a zucchini-and-cheese mixture while still delivering a savory, cheesy texture.
That makes it a useful option when you’re looking for Low Carb Zucchini Cheese Bread ideas.
How This Recipe Compares to Traditional Bread
Traditional bread relies on ingredients such as flour, yeast, or other leavening agents to create its structure.
Cheesy Zucchini Breadsticks take a completely different approach.
The structure comes from a combination of drained zucchini, egg, and cheese.
You won’t get the same airy crumb as a yeast-raised loaf, and that’s not the goal.
Instead, you get a thin, savory crust with browned edges and a cheesy interior.
Think of it less like sandwich bread and more like a cross between a vegetable crust, cheese bread, and breadstick.
That’s what makes this Cheesy Zucchini Bread so fun.
Simple Bread And Zucchini Meal Ideas
These breadsticks can help round out an entire meal without much extra work.
Pair them with grilled chicken and a simple vegetable salad.
Serve them alongside tomato soup.
Add them to a dinner plate with roasted vegetables and your favorite protein.
Or turn them into a snack board with marinara, olives, sliced vegetables, and deli meats.
For a quick meal, a few warm breadsticks and a fresh salad can be surprisingly satisfying.
That makes this Simple Bread And Zucchini Meal especially handy on busy nights.
FAQs About Cheesy Zucchini Breadsticks
Why are my Cheesy Zucchini Breadsticks too soft?
The most common reason is excess moisture in the zucchini. Make sure you squeeze the grated zucchini thoroughly before combining it with the other ingredients. Spreading the mixture too thickly can also leave the middle softer than you want.
Can I use pre-shredded cheese?
Absolutely, but freshly grated cheese generally melts more smoothly. Pre-shredded cheese is convenient, so it works when you’re short on time. For the best texture and flavor, though, grating your own cheese from a block is worth the small amount of extra effort.
Can I use different cheeses?
Yes. Mozzarella is an excellent choice because it melts well, while Parmesan adds salty, savory depth. You can also experiment with blends depending on the flavor you’re after.
Why do I need to bake the zucchini mixture at a high temperature?
Zucchini contains substantial moisture. A higher oven temperature helps the surface brown and encourages the crust to cook through without staying overly soft.
Can I make these into a pizza crust?
Definitely. Shape the zucchini mixture into a round instead of a rectangle, bake the crust, then add your desired toppings. It’s an easy way to turn the recipe into a zucchini-based pizza.
Can I make Cheesy Zucchini Breadsticks ahead of time?
You can prepare them ahead for short-term storage, but they taste best fresh. Refrigerate leftovers for up to 3 days and reheat them in the oven or air fryer to bring back some crispness.
Can I freeze them?
I don’t recommend it. The high water content in zucchini can make the texture watery and mushy after freezing and thawing.
What should I serve with them?
Marinara sauce is my first choice. You can also try ranch, garlic butter, or another savory dipping sauce.
Final Thoughts on Cheesy Zucchini Breadsticks
Cheesy Zucchini Breadsticks are one of those recipes that make a vegetable feel like the best part of the meal.
They take humble zucchini, combine it with plenty of cheese, and turn it into something warm, golden, savory, and seriously snackable.
The trick is simple: remove as much moisture as possible, spread the mixture thinly, and bake it hot.
Do those three things, and the result is a surprisingly satisfying alternative to traditional breadsticks.
Whether you call them Cheesy Zucchini Bread, Cheese Zucchini Bread, Zucchini Cheese Bread, or Zucchini Cheesy Bread, the idea remains the same: delicious comfort food with zucchini doing the heavy lifting.
And when my mother’s garden starts producing zucchini faster than anyone knows what to do with, this is one recipe I’m always happy to make again.
Because honestly, when vegetables turn into crispy, cheesy breadsticks, nobody at the table seems interested in complaining.
Follow me on Pinterest for daily new recipes.
PrintCheesy Zucchini Breadsticks | Easy Low Carb Zucchini Cheese Bread
These Cheesy Zucchini Breadsticks turn fresh grated zucchini, mozzarella, Parmesan, egg, and savory seasoning into a golden, cheesy crust that slices beautifully into breadstick-style pieces. The key is removing as much moisture as possible before baking so the crust gets firm and lightly crisp around the edges. Finish it with another layer of melted cheese, then serve the breadsticks hot with marinara or your favorite dipping sauce.
- Prep Time: 20 minutes
- Cook Time: 20 minutes
- Total Time: 40 minutes
- Yield: 6 servings 1x
- Category: Dinner
Ingredients
- 4 cups grated zucchini
- 1/2 cup shredded mozzarella cheese
- 1/3 cup grated Parmesan cheese
- 1 large egg
- 1 teaspoon garlic parsley salt
- 1 cup shredded cheese of your choice for the topping
Instructions
- Drain the zucchini thoroughly. Start by grating the zucchini and preparing it for mixing. Because zucchini naturally holds a substantial amount of water, removing that liquid is the most important part of the recipe. If you want to draw out even more moisture, lightly salt the grated zucchini and let it rest for about 10 minutes before squeezing it.
- Transfer the grated zucchini to a clean kitchen towel. Gather the towel around the zucchini and firmly squeeze the bundle over the sink or a large bowl. Keep pressing and twisting the towel until you have removed as much liquid as possible. Do not rush this step. The drier the zucchini becomes, the firmer and more bread-like the finished crust will be.
- Combine the zucchini with the remaining crust ingredients. Place the well-drained zucchini in a large mixing bowl. Add the shredded mozzarella, Parmesan, egg, and garlic parsley salt. Stir everything together thoroughly until the egg coats the mixture and the cheeses are distributed evenly throughout the zucchini.
- Prepare your baking surface. Line a suitable baking sheet or baking dish with parchment paper, or use a silicone baking mat. A silicone mat works particularly well because the finished crust can lift away easily. Make sure the baking surface is large enough to spread the zucchini mixture into a relatively thin layer.
- Spread the zucchini mixture into an even layer. Transfer the mixture onto the prepared baking sheet. Use a spatula, spoon, or your hands to gently press and spread it across the surface. Aim for a thickness of approximately 1/2 inch. Try to keep the layer as even as possible because thick areas will retain more moisture and may stay softer than the rest of the crust.
- Bake the first layer. Preheat the oven to 425°F and place the prepared baking sheet inside. Bake the zucchini mixture for about 15 minutes. The high temperature helps drive off excess moisture while allowing the edges and surface to develop some color. At the end of this first baking period, the crust should look set and lightly browned.
- Add the cheese topping. Carefully remove the baking sheet from the oven. Sprinkle the remaining shredded cheese evenly across the entire baked zucchini crust. You can use mozzarella, a Mexican-style cheese blend, or another melting cheese you enjoy.
- Bake again until the cheese melts. Return the baking sheet to the hot oven and bake for another 2 to 5 minutes. Watch the bread closely during this second bake. You only need enough time for the topping to melt completely and develop a lightly golden surface. Avoid leaving it in the oven longer than necessary.
- Let the crust cool just enough to handle. Remove the baking sheet from the oven and allow the cheesy crust to rest briefly. It should still be hot and gooey, but cool enough for you to cut it safely.
- Slice into breadsticks. Using a sharp knife or pizza cutter, divide the baked zucchini crust into strips. Make the pieces as wide or narrow as you prefer depending on whether you want substantial breadstick-style portions or smaller snack-sized pieces.
- Serve immediately. These breadsticks are best when served hot and fresh from the oven, while the melted cheese is soft and stretchy. Pair them with warm marinara sauce, garlic butter, ranch, or another favorite dipping sauce.
Notes
Recipe Notes
- Do not skip the zucchini-squeezing step. Excess liquid is the biggest factor that can leave your crust too soft.
- Use a large baking sheet so you can spread the mixture into a thin, even layer.
- Keep the crust close to 1/2 inch thick for the best balance between structure and tenderness.
- Bake at 425°F rather than reducing the temperature. The heat helps the zucchini crust brown and firm up.
- Freshly grated cheese works especially well because it melts smoothly and adds excellent flavor.
- Serve the breadsticks right away for the best texture.
- Parchment paper works well, but a silicone baking mat is a useful reusable option if you make this recipe often.
Storage and Reheating
Place cooled leftovers in an airtight container and refrigerate for up to 3 days.
For the best reheated texture, avoid the microwave.
Oven: Place the breadsticks on a baking sheet and heat at 375°F for 5 to 7 minutes, or until hot and lightly crisp.
Air fryer: Reheat at 350°F for 3 to 4 minutes.
Freezing is not recommended because the zucchini’s high moisture content can cause the breadsticks to become watery and mushy after thawing.
Nutrition
- Serving Size: 1 serving
- Calories: 130
- Sugar: 2g
- Sodium: 669mg
- Fat: 9g
- Saturated Fat: 5g
- Carbohydrates: 3g
- Fiber: 1g
- Protein: 10g
- Cholesterol: 53mg