If you’ve ever wanted a dessert that tastes like a Reese’s cup but acts like a wellness queen, you’re in the right place. These No Bake Peanut Butter Chocolate Oat Cups are the definition of the sweet spot (literally). They’re creamy, chocolatey, nutty, and — wait for it — good for you. Yes, you can have your chocolate and eat it too.
What Makes These Peanut Butter Chocolate Oat Cups So Irresistible
Let’s get real — peanut butter and chocolate might just be the power couple of the dessert world. You’ve got rich, salty-smooth peanut butter meeting velvety melted chocolate in a no-bake, no-fuss situation. What’s not to love?
But here’s the kicker: these cups are secretly one of the Healthiest Desserts you can whip up in under 20 minutes. They’re made with only four ingredients — oat flour, peanut butter, maple syrup, and chocolate chips — plus a dash of optional coconut oil for silky-smooth shine.
And the best part? You don’t need an oven, a mixer, or even much patience. These are the ultimate Quick And Healthy Desserts that hit every craving while keeping your energy (and mood) on the rise.
The Story Behind This Recipe
So, how did these little cups of joy come about? Honestly, I was hunting for a Dessert Healthy Easy enough to make on a lazy Sunday afternoon — something I could snack on without feeling like I’d just demolished a bakery display case.
As a lifelong peanut butter devotee (team spoon-straight-from-the-jar forever), I wanted something that leaned more nutritious indulgence than sugar bomb. Enter: this recipe. The oats bring wholesome texture, the maple syrup adds natural sweetness, and the peanut butter? Well, it’s basically nature’s frosting.
These cups became my go-to Make Healthy Snacks recipe — a sweet fix that works for breakfast, snack time, or that “I deserve a treat” moment after dinner.
Ingredients You’ll Need (and Why They Rock)
Let’s break down the essentials — no weird powders, no “what even is that” ingredients, just pantry staples with a purpose.
Oat Flour
This is the secret MVP. It gives the cups their structure while adding a nice boost of fiber. You can buy it, but honestly? Making your own is ridiculously easy. Just toss some rolled oats into a food processor and blitz until fine. Boom. Homemade oat flour in 30 seconds.
Pro tip: If you’ve got a sensitive stomach or just want to play it safe, you can heat-treat your oats first. It’s as simple as spreading them on a baking sheet and baking at 350°F for 10 minutes.
Peanut Butter
Ah, the heart and soul of these cups. If you’ve ever Googled How To Use Peanut Butter in dessert recipes, this one’s your jackpot. You can go creamy, chunky, natural, or classic Skippy-style — it’s all fair game. Natural peanut butter gives a looser, more wholesome texture, while processed kinds create a denser bite.
Pure Maple Syrup
This is your natural sweetener and your glue. It keeps the oat mixture together and adds a subtle caramel-like depth that plain sugar just can’t touch. You can swap it for honey, but IMO, maple syrup brings the magic.
Chocolate Chips
Go semi-sweet, dark, or milk chocolate — you do you. If you want to go extra classy, throw in some sea salt flakes or a sprinkle of cocoa nibs on top. If you’re making Healthy Kid Desserts, use mini chocolate chips to make them more fun and bite-sized.
Coconut Oil (optional)
A tiny teaspoon of this makes your melted chocolate smoother, glossier, and a little more forgiving. It’s a small step that levels up your Healthy Snacks With Chocolate game.
How To Make It – Step-by-Step
- Mix the Base:
Combine peanut butter and maple syrup in a microwave-safe bowl. Heat for about 45 seconds, stir it up, and you’ll have a gorgeous, gooey base. - Add the Oats:
Mix in your oat flour until everything’s thick but moldable. This is your moment to channel your inner sculptor — think playdough, but edible and delicious. - Shape the Cups:
Line a muffin pan or grab a silicone mold (for easy removal later). Press the mixture evenly into the cups and flatten with your fingers. - Melt the Chocolate:
Microwave chocolate chips with coconut oil in short bursts until smooth. Pour a luscious layer of chocolate over each peanut butter cup and spread it evenly. - Chill:
Pop those beauties into the fridge for about 2–3 hours. Once they’re set, remove, admire, and try not to eat all twelve at once (no promises).
Why You’ll Be Obsessed
- No oven. No stress. No excuses.
- Just four ingredients and about 10 minutes of prep.
- They’re high in healthy fats, fiber, and flavor.
- Perfect Sweet Tooth Snacks that actually fuel you.
- Great for kids, adults, and anyone living the snack life.
Variations to Try
Feeling creative? You can absolutely make this recipe your own:
- Almond Butter Lovers: Swap peanut butter for almond or cashew butter. It’s just as creamy and slightly lighter in flavor.
- Protein Boost: Add a scoop of vanilla or chocolate protein powder to the oat mixture for a post-workout snack that tastes like dessert.
- Nut-Free Version: Use sunflower seed butter or tahini — still delicious and allergen-friendly!
- Layer It Up: Want a more dramatic look? Add a drizzle of white chocolate or melted dark chocolate once the first layer sets. Go Picasso on it.
Pro Tips for Perfect Cups
- Use silicone molds. Getting these out in one piece is a dream with silicone.
- Microwave your peanut butter mixture gently. Too hot, and it can seize or separate.
- Let them chill fully. They’re soft right out of the fridge, but firm up beautifully after a few hours.
- Sprinkle with sea salt. Trust me — a little salt on top makes them chef’s kiss good.
Best Way to Serve
Straight from the fridge, baby. The contrast between the firm chocolate and the creamy peanut butter layer is next-level.
If you want to be fancy, serve them on a chilled dessert platter at brunch or an afternoon tea setup. They’re the kind of Healthy Snacks And Desserts that make people go, “Wait… these are good for me?”
Storage Tips
- Store them in an airtight container in the fridge for up to 5 days.
- They also freeze beautifully! Wrap individually and thaw at room temp for 10 minutes before serving.
- If you somehow don’t eat them all immediately (teach me your restraint), they’ll still taste amazing days later.
FAQs
Can I use almond butter instead of peanut butter?
Absolutely. Any nut or seed butter works here — just expect slight texture differences.
Can I make them vegan?
They already are! Just double-check that your chocolate chips are dairy-free.
Can I use a different flour?
Yes — almond flour or coconut flour work great. Avoid raw wheat flour since it needs heat treatment.
Do I have to refrigerate them?
Yes. Since these are no-bake and use maple syrup, refrigeration keeps them fresh and firm.
Final Thoughts
If you’re looking for a dessert that feels indulgent but fuels your body, these no bake peanut butter chocolate oat cups check every box. They’re a snack, a dessert, a peace offering, and a reward all rolled into one.
They prove that “healthy” doesn’t mean boring — it means balanced, flavorful, and satisfying as heck. So go ahead — grab that peanut butter jar and show your inner baker some love. You deserve these.
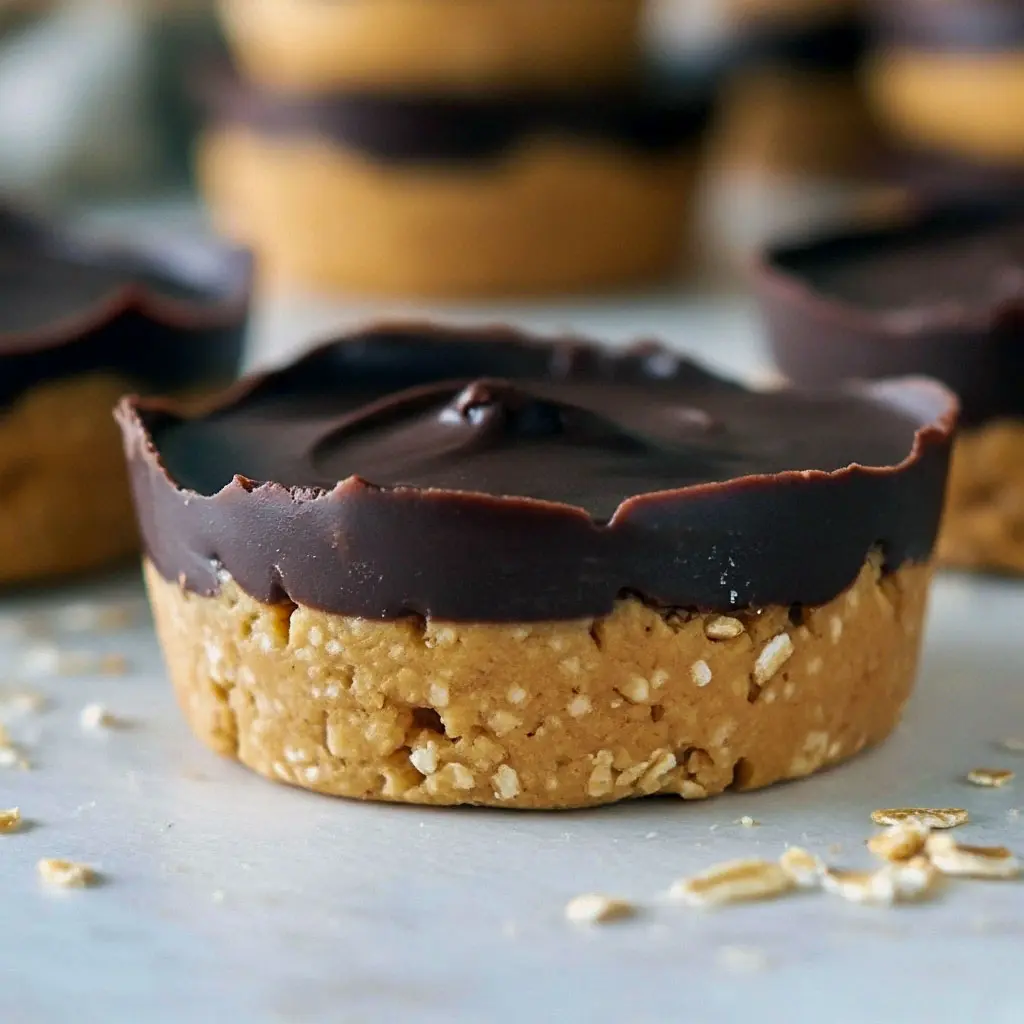
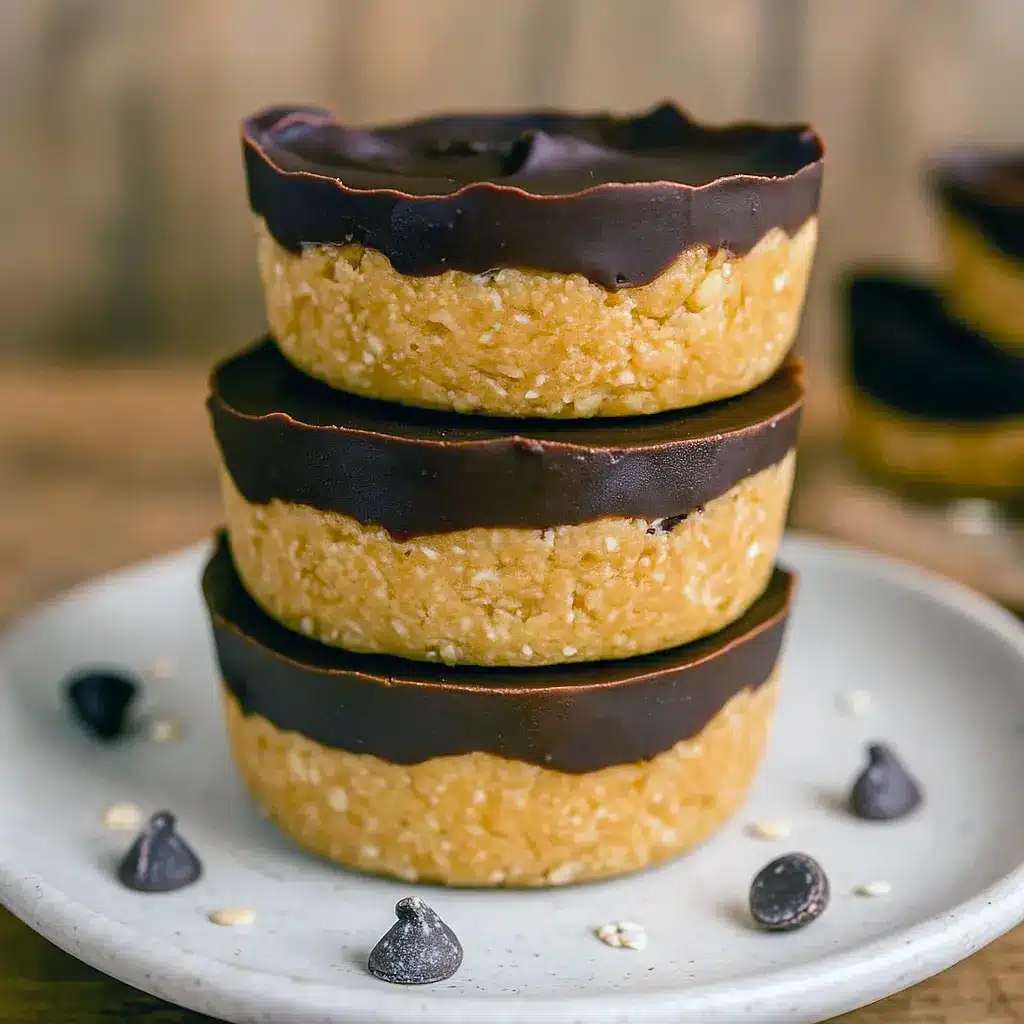
Healthiest Desserts – No Bake Peanut Butter Chocolate Oat Cups
Think peanut butter cup meets oatmeal cookie dough — but healthier, quicker, and no oven drama. These no bake chocolate oat cups are rich, creamy, and guaranteed to satisfy every sweet tooth in the house. Perfect for busy days, school snacks, or that late-night “I just need a bite of something sweet” situation.
- Prep Time: 10 minutes
- Total Time: 10 minutes
- Yield: 12 servings 1x
- Category: Dessert
Ingredients
- 1 ½ cups peanut butter
- 1 ½ cups oat flour (made by blitzing rolled oats in a food processor until fine)
- ¼ cup pure maple syrup
- 1 cup chocolate chips
- 1 teaspoon coconut oil (optional, but makes the chocolate topping extra silky)
Instructions
- Warm up the good stuff.
- Toss your peanut butter and maple syrup into a microwave-safe bowl. Heat for about 40–60 seconds, just until everything loosens up and starts to blend easily. Stir well until smooth and glossy.
- Add the oats.
- Gradually mix in your oat flour. It’ll take a little muscle — or a stand mixer if you’d rather let the machine earn its keep. The texture should be thick and doughy but still soft enough to press into a mold.
- Pro tip: If it looks too crumbly, add a teaspoon more peanut butter or syrup at a time until it holds together. For a softer, moister version, stir in ¼–⅓ cup pumpkin puree. Trust me, it’s a game-changer.
- Prep the pan.
- Line a muffin tin with paper or silicone liners (don’t skip this — they stick otherwise). Silicone pans work best since the cups pop right out like magic. Mini muffin tins are great for bite-size versions.
- Form the base.
- Divide the peanut butter mixture evenly between the cups. Press down gently with your fingertips to form a smooth, even base.
- Melt the chocolate.
- In a small microwave-safe bowl, combine the chocolate chips and coconut oil. Microwave in 30-second bursts, stirring between each round, until silky smooth. Don’t overheat — chocolate burns faster than you think.
- Top it off.
- Spoon melted chocolate over each peanut butter base and smooth the tops with the back of a spoon.
- Feeling fancy? Sprinkle a pinch of flaky sea salt, a few mini chips, or some colorful sprinkles before the chocolate sets.
- Let them chill.
- Pop the tray into the fridge for 2–3 hours or until everything firms up beautifully. Once set, gently remove each cup from its liner or mold.
- Store and snack smart.
- Keep your oat cups in an airtight container in the fridge for up to 5 days. Because these are no-bake and full of natural ingredients like maple syrup and peanut butter, they’re happiest when kept cool.
Notes
- Pumpkin twist: Mix in ⅓ cup pumpkin puree plus 1 ½ teaspoons pumpkin pie spice for cozy fall vibes.
- Nut butter swap: Almond, cashew, or sunflower butter all work perfectly — experiment with your favorite!
- Chocolate switch-up: Use dark chocolate for a richer flavor or white chocolate for a sweeter, creamier version.