Quick & Rich Brown Butter Espresso Brownies — A Coffee Chocolate Dessert Everyone Loves
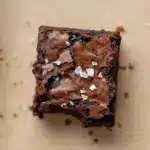
These brownies combine nutty browned butter with a pronounced espresso kick for ultra-fudgy bars with gooey centers and chewy edges. Same great structure, totally refreshed wording — ready to drop into your recipe card.
- Prep Time: 20 minutes
- Cook Time: 28 minutes
- Total Time: 48 minutes
- Yield: 16 brownies 1x
- Category: Dessert
- Diet: Vegetarian
Ingredients
Scale
- 1 cup (226 g) unsalted butter, cold (for browning)
- 1 cup + 2 Tbsp (200 g) semi-sweet chocolate chips
- 1 cup (128 g) all-purpose flour
- 3 Tbsp (16 g) dark cocoa powder
- 2 Tbsp espresso powder
- ½ tsp fine salt
- 1 ¼ cups (250 g) granulated sugar
- 3 large eggs
- ½ Tbsp vanilla extract
Instructions
- Preheat the oven to 350°F (180°C). Line an 8×8″ square metal baking pan with parchment, leaving an overhang to lift the baked slab out easily later.
- Brown the butter: melt the cubed butter in a light-colored stainless steel skillet over medium heat. It will foam and crackle — keep an eye on it and stir occasionally. When brown flecks appear on the bottom and the pan gives off a toasty, nutty aroma, remove from heat and pour the butter (including those browned solids) into a heatproof bowl.
- Add the chocolate chips to the hot browned butter. Let sit 30–60 seconds, then stir until the chocolate is fully melted and the mixture is glossy. Scrape the bowl well so none of the browned bits are left behind.
- Whisk the dry mix: in a separate bowl, combine the flour, dark cocoa powder, espresso powder and salt. Whisk to blend and set aside.
- In a large mixing bowl, beat the eggs, sugar and vanilla on medium speed for 1–2 minutes until the mixture lightens slightly.
- With the mixer running on low, slowly drizzle the warm chocolate-butter into the egg mixture. Mix until just combined — don’t overwork it.
- Gently fold the dry ingredients into the wet batter with a rubber spatula just until no streaks remain. Stop as soon as it’s homogeneous.
- Transfer the batter to the prepared pan and smooth the surface with a spatula.
- Bake 30–40 minutes. You’re looking for a toothpick that comes out with a few moist crumbs clinging to it. (If your pan is glass or has rounded corners, the bake can take longer — up to ~45–50 minutes.)
- Cool the pan on a wire rack until completely set. Use the parchment overhang to lift the slab out, then cut into 16 squares with a hot, sharp knife (wipe the blade between cuts for clean edges).
Notes
- Notes & pro tips
- Use a light pan to brown butter so you can monitor color. Burnt butter = bitter; browned butter = toffee-like depth.
- Pan matters. A metal 8×8″ pan with straight edges bakes more predictably. Glass or ceramic retains heat and usually requires more time.
- Weigh your flour when possible. If you must use cups, spoon the flour into the cup and level—don’t scoop.
- Tempering: pouring hot chocolate into eggs too fast can scramble them. Add slowly while mixing.
- Perfect fudgy center: remove the brownies when the center still jiggles slightly or a toothpick shows moist crumbs — they will finish setting as they cool.
- Storage
- Room temp in an airtight container: 2–3 days.
- Refrigerate to extend to about 7 days (bring to room temp before serving).
- Freeze individual squares, separated by parchment, for up to 3 months. Thaw at room temperature or warm briefly in a low oven.
- Scaling & pan swaps
- To make thinner bars, use a 9×13″ pan and reduce baking time. Keep a close eye; thinner batter bakes faster.
Nutrition
- Serving Size: 1 serving
- Calories: 299kcal
- Sugar: 21g
- Sodium: 105mg
- Fat: 18g
- Carbohydrates: 32g
- Fiber: 1g
- Protein: 4g
- Cholesterol: 61mg
