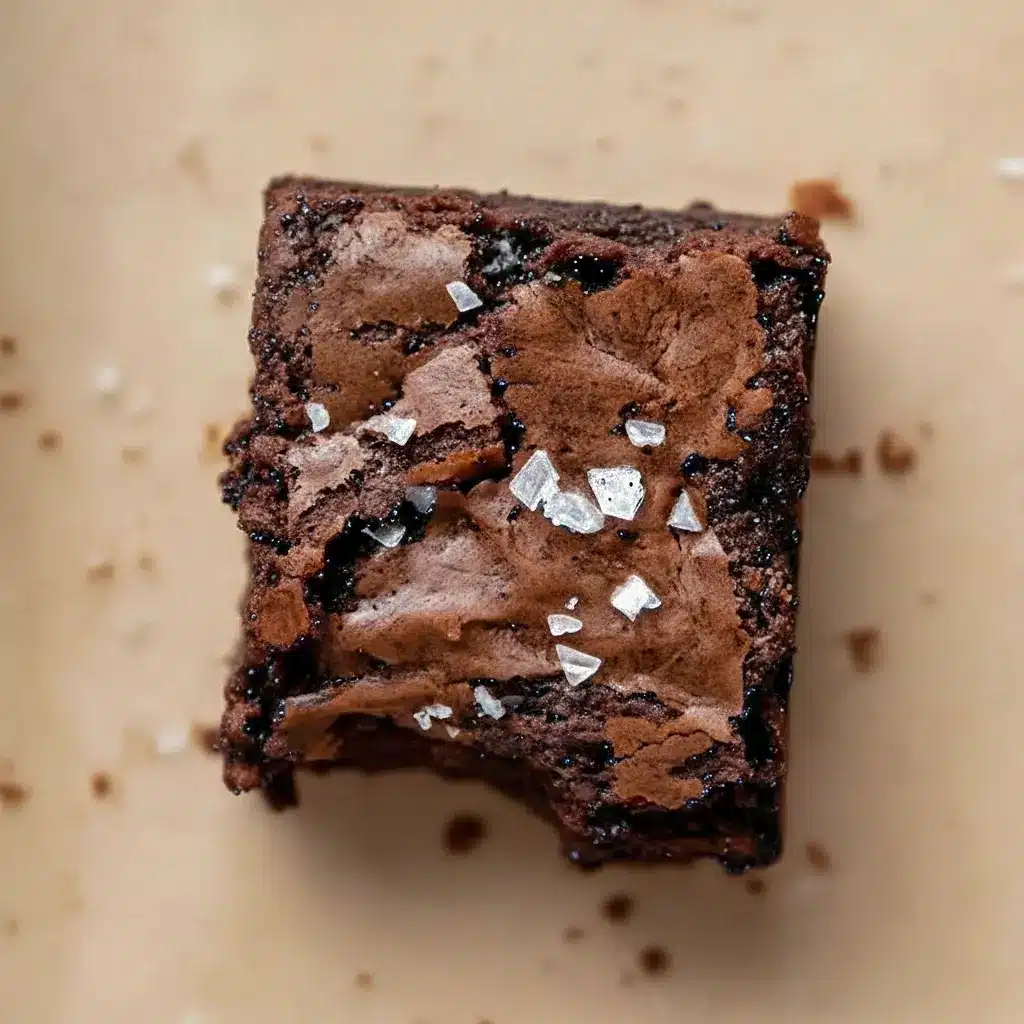
Coffee Chocolate Dessert lovers, this one’s for you — fudgy, glossy, and impossibly chocolatey, these Brown Butter Espresso Brownies pair nutty brown butter with an espresso punch for a seriously grown-up treat. They deliver gooey middles, chewy edges, and a deep coffee-chocolate profile that turns a simple square into a show-stopping bite.
Table of Contents
Why you’ll fall in love with these brownies
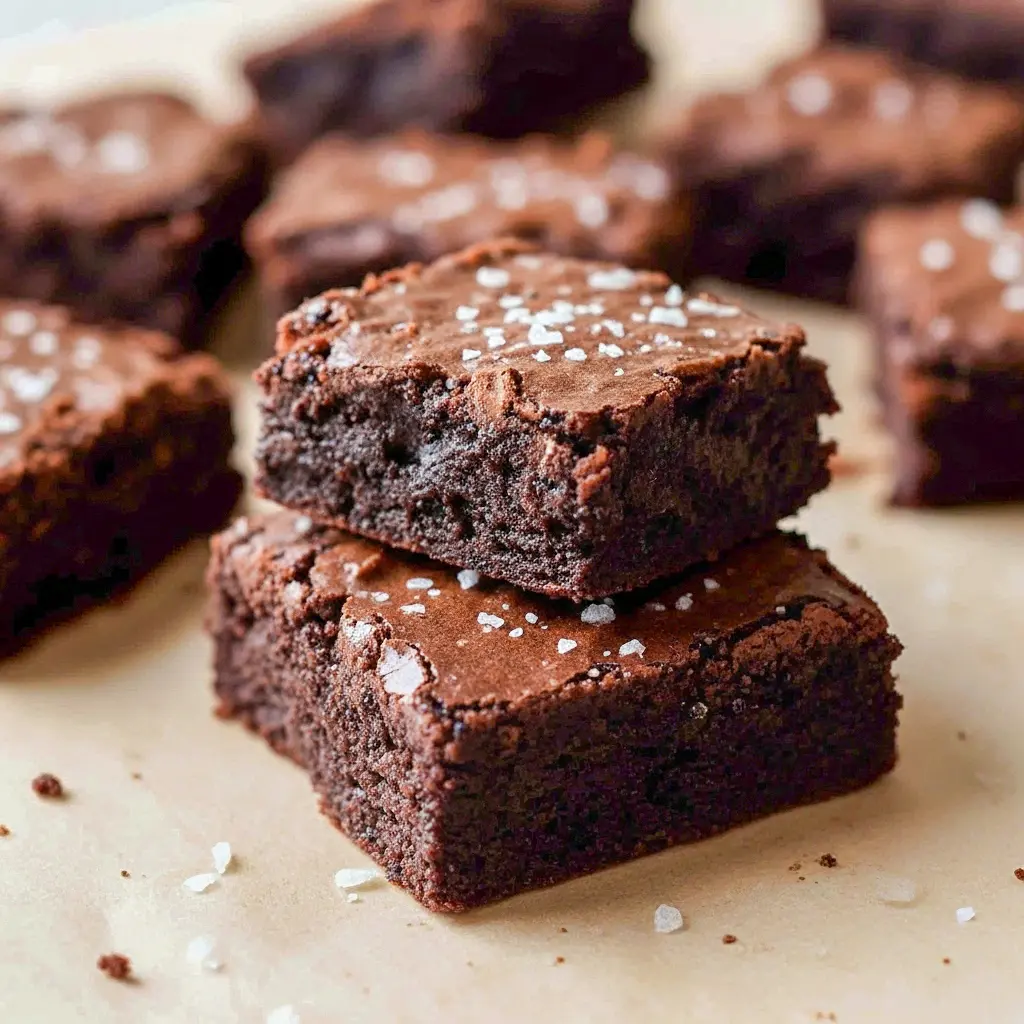
If you worship the marriage of coffee and chocolate, these brownies read like poetry. They’re thick, not cakey, with a chewy perimeter and a molten center. Browning the butter adds a toasty, caramel note that makes the chocolate sing. And the espresso? It lifts the chocolate’s depth without making the bars taste like a cup of coffee — perfect for anyone who wants Desserts With Coffee but Desserts That Are Not Too Sweet.
They’re also an excellent pick if you want to make Easy Bakesale Treats that look gourmet, or test a Baking Unique twist for your weekend bake. Ready in under an hour, they fit busy schedules but taste like you spent all day. Win-win.
The Key Ingredients (and Why You Need Them)
Below I list the main ingredients (no amounts here — the printable card has those). I’ll explain what role each plays so you understand how and why to tweak things.
- Unsalted butter (browned): Browning concentrates the butter’s milk solids into nutty, toffee-like notes. This transforms ordinary brownies into Buttery Dessert Recipes with depth.
- High-quality chocolate (chips or chopped bar): Chocolate supplies structure and shine. Using a good chocolate brand improves flavor and texture dramatically.
- Cocoa powder (Dutch-processed if possible): Adds intensity and keeps the crumb fudgy rather than cakey.
- Granulated sugar (and optional light brown sugar): Sugar sweetens and supports the chewy edge when combined with eggs. A touch of brown sugar can add extra chew and a hint of molasses.
- Eggs: They bind, lift slightly, and create the fudgy interior when handled correctly.
- Flour (all-purpose): Gives body — but not too much. Over-flouring makes dry brownies.
- Espresso powder or finely ground espresso: This is the secret for big coffee flavor without adding liquid. It amplifies the chocolate and counts as one of the best Coffee Ground Recipes uses.
- Salt & vanilla: Salt balances sweetness; vanilla rounds the profile and enhances chocolate notes.
- Optional mix-ins: Chocolate chunks, toasted nuts, or a sprinkle of flaky salt on top for contrast.
Pro tip: Brown the butter in a light-colored skillet so you can see the color shift and avoid burning. Browning equals flavor.
How to Make It
This is the step-by-step you can drop into your recipe card. Keep your tools ready: a stainless pan for browning, a stand mixer—or a hand mixer—and an 8×8 or 9×9 pan lined with parchment.
- Preheat & prep. Heat your oven to the temperature in the recipe card. Line your baking pan with parchment leaving an overhang for easy removal later.
- Brown the butter. Melt unsalted butter in a light skillet over medium heat. Stir as it foams and crackles. Watch for brown flecks and a nutty aroma. When you see the brown bits, remove from heat immediately. Pour the butter into a bowl and mix in the chocolate so it melts from residual heat. Scrape all the browned solids into the bowl—they’re gold.
- Whisk eggs & sugar. Use your mixer to beat eggs, sugar, and vanilla until the mixture thickens slightly and turns pale. This adds structure while keeping the crumb dense and fudgy.
- Combine chocolate & eggs. Stream the warm chocolate-butter mixture into the eggs while mixing slowly so the eggs temper and don’t scramble. Mix until just combined.
- Fold in dry ingredients. Sift or whisk flour, cocoa, salt, and espresso powder; fold gently into the chocolate batter. Stop when you see no streaks—don’t overwork it.
- Optional add-ins. Fold in any chocolate chunks or nuts. Spoon the batter into the prepared pan and smooth the top.
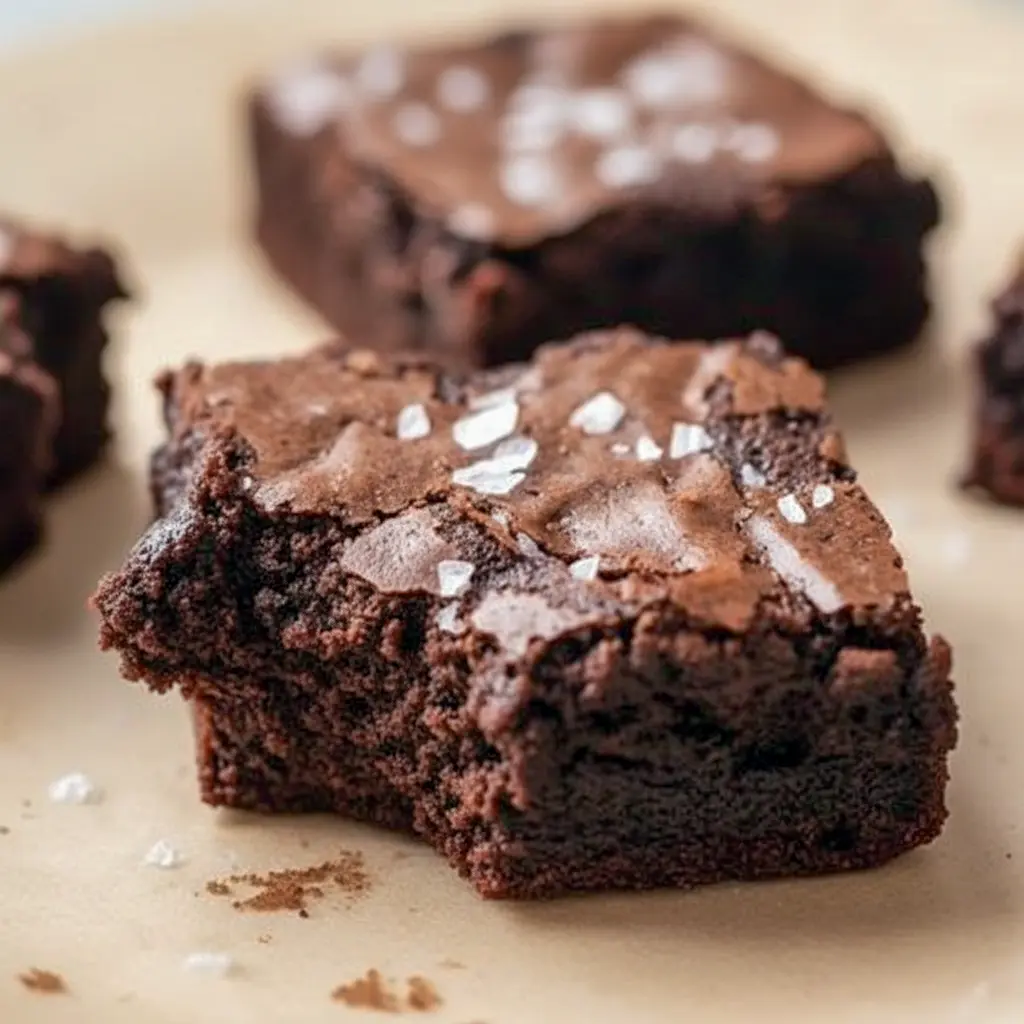
- Bake until fudgy. Bake until the center holds a few moist crumbs on a toothpick. Err on the side of slight underbake for perfect gooey centers.
- Cool fully before slicing. Let the brownies cool completely in the pan, then chill briefly if you want clean, neat cuts. Use a sharp knife or warmed blade for slicing.
Bold tip: Slight jiggle in the center is a good thing. Pull the brownies when a toothpick comes out with moist crumbs — they’ll firm up as they cool.
Expert baking tips (so you don’t mess this up)
- Use the right pan for browning butter. A light-colored pan helps you see exactly when the milk solids brown.
- Weigh flour when possible. Baking by weight avoids dry, over-floured results. If you use cups, spoon and level — don’t scoop.
- Temper the eggs. When combining hot chocolate with eggs, stream slowly while mixing to avoid scrambling.
- Don’t overmix once flour hits the bowl. Too much stirring develops gluten and yields cakier brownies. We want dense and fudgy.
- Let them cool. I repeat: wait. Cooling and slight refrigeration help set the gooey center for precise squares.
- Add texture. Fold in chocolate chunks or crushed toasted espresso beans for contrast. A flake-salt finish heightens flavor.
Variations to try (because experimentation is fun)
- Tiramisu twist: Fold in mascarpone ribbons or dust with cocoa and espresso after cooling. I used this same base to make tiramisu brownies and they were insane.
- Brown butter praline: Fold in crushed browned butter pecans for serious crunch.
- Espresso ganache layer: Spread a thin coffee-chocolate ganache over the cooled bars for extra gloss and coffee power.
- Vegan adaptation: Use vegan butter, aquafaba or flax egg, and a plant-based chocolate. Texture will vary, but flavor still slaps.
- Lower-sugar version: Swap some sugar for erythritol or monk fruit blends, but expect slightly different texture and browning.
Best ways to serve these brownies
- Serve slightly warm with a scoop of vanilla gelato or coffee ice cream for a classic combo.
- Present them on a dessert board with biscotti, fresh berries, and a small pitcher of heavy cream — café-style.
- Cut into bite-sized squares and skewer with espresso-dipped strawberries for an elegant party bite. These are perfect Easy Bakesale Treats that sell fast.
- Drizzle with salted caramel for a salty-sweet contrast that makes the espresso sing.
Quick tips for storage & freezing
- Room temp: Keep airtight at room temperature for 2–3 days.
- Fridge: Store in the refrigerator to extend life to about a week. Bring to room temp or warm slightly before serving.
- Freeze: Cut into squares, layer with parchment in an airtight container, freeze up to 3 months. Thaw at room temp or warm briefly in a low oven.
Bold tip: Freeze single squares so you can grab one and warm it for an instant treat.
Frequently Asked Questions
Will browning the butter really make a difference?
Yes — browning gives caramelized, nutty notes that deepen chocolate flavor and create a richer, more complex profile than plain melted butter.
How much caffeine is in these brownies?
You’ll get a mild caffeine boost. Recipes generally use espresso powder (a couple tablespoons) for the whole batch, so each square has only a little caffeine — not an espresso shot.
Can I use instant coffee instead of espresso powder?
You can, but espresso powder offers a more concentrated, less bitter coffee flavor. If you use instant coffee, choose a fine grind and use a slightly larger amount.
What’s the best way to get gooey centers?
Underbake slightly. Remove brownies when a toothpick has moist crumbs — they will set as they cool.
Can I make these in a different pan?
Yes — a 9×13 pan will produce thinner brownies and shorten bake time. Keep an eye on them and adjust.
Why this recipe works (the science bit, short)
Brown butter provides toasted milk solids and complex Maillard flavors. Espresso powder doesn’t make the brownies taste like coffee; it amplifies chocolate’s bitter-sweet notes. Eggs and sugar create a stable matrix for fudgy texture; minimal flour prevents structure from becoming cakey. Combine these techniques and you get dense, shiny, crackly-topped brownies with gooey centers.
Are these brownies healthy?
Look — they’re still brownies. But if you want a smarter treat, use high-quality dark chocolate, reduce sugar slightly, or serve smaller squares. They still hit the Coffee Chocolate Dessert criteria while offering better flavor depth than sugar-only bars.
Ideas for selling or gifting
- Pack in clear boxes with a ribbon and a small card describing the brown-butter and espresso twist — they read gourmet.
- Offer sampler trays with classic, salted caramel, and espresso variants at fundraisers — these are killer Easy Bakesale Treats.
- Market them online with high-quality photos that show the gooey interior — people buy with their eyes.
Final thoughts
These Brown Butter Espresso Brownies sit squarely in the intersection between rustic comfort and refined dessert — a perfect Coffee Chocolate Dessert for anyone who loves bold flavor. They check the boxes for Baking Unique creativity, fit into Buttery Dessert Recipes hall of fame, and leverage Coffee Ground Recipes in the best way. Whether you’re baking for a bake sale, a dinner party, or a quiet night in, these brownies deliver every time.
Follow me on Pinterest for daily new recipes.

Quick & Rich Brown Butter Espresso Brownies — A Coffee Chocolate Dessert Everyone Loves
These brownies combine nutty browned butter with a pronounced espresso kick for ultra-fudgy bars with gooey centers and chewy edges. Same great structure, totally refreshed wording — ready to drop into your recipe card.
- Prep Time: 20 minutes
- Cook Time: 28 minutes
- Total Time: 48 minutes
- Yield: 16 brownies 1x
- Category: Dessert
- Diet: Vegetarian
Ingredients
- 1 cup (226 g) unsalted butter, cold (for browning)
- 1 cup + 2 Tbsp (200 g) semi-sweet chocolate chips
- 1 cup (128 g) all-purpose flour
- 3 Tbsp (16 g) dark cocoa powder
- 2 Tbsp espresso powder
- ½ tsp fine salt
- 1 ¼ cups (250 g) granulated sugar
- 3 large eggs
- ½ Tbsp vanilla extract
Instructions
- Preheat the oven to 350°F (180°C). Line an 8×8″ square metal baking pan with parchment, leaving an overhang to lift the baked slab out easily later.
- Brown the butter: melt the cubed butter in a light-colored stainless steel skillet over medium heat. It will foam and crackle — keep an eye on it and stir occasionally. When brown flecks appear on the bottom and the pan gives off a toasty, nutty aroma, remove from heat and pour the butter (including those browned solids) into a heatproof bowl.
- Add the chocolate chips to the hot browned butter. Let sit 30–60 seconds, then stir until the chocolate is fully melted and the mixture is glossy. Scrape the bowl well so none of the browned bits are left behind.
- Whisk the dry mix: in a separate bowl, combine the flour, dark cocoa powder, espresso powder and salt. Whisk to blend and set aside.
- In a large mixing bowl, beat the eggs, sugar and vanilla on medium speed for 1–2 minutes until the mixture lightens slightly.
- With the mixer running on low, slowly drizzle the warm chocolate-butter into the egg mixture. Mix until just combined — don’t overwork it.
- Gently fold the dry ingredients into the wet batter with a rubber spatula just until no streaks remain. Stop as soon as it’s homogeneous.
- Transfer the batter to the prepared pan and smooth the surface with a spatula.
- Bake 30–40 minutes. You’re looking for a toothpick that comes out with a few moist crumbs clinging to it. (If your pan is glass or has rounded corners, the bake can take longer — up to ~45–50 minutes.)
- Cool the pan on a wire rack until completely set. Use the parchment overhang to lift the slab out, then cut into 16 squares with a hot, sharp knife (wipe the blade between cuts for clean edges).
Notes
- Notes & pro tips
- Use a light pan to brown butter so you can monitor color. Burnt butter = bitter; browned butter = toffee-like depth.
- Pan matters. A metal 8×8″ pan with straight edges bakes more predictably. Glass or ceramic retains heat and usually requires more time.
- Weigh your flour when possible. If you must use cups, spoon the flour into the cup and level—don’t scoop.
- Tempering: pouring hot chocolate into eggs too fast can scramble them. Add slowly while mixing.
- Perfect fudgy center: remove the brownies when the center still jiggles slightly or a toothpick shows moist crumbs — they will finish setting as they cool.
- Storage
- Room temp in an airtight container: 2–3 days.
- Refrigerate to extend to about 7 days (bring to room temp before serving).
- Freeze individual squares, separated by parchment, for up to 3 months. Thaw at room temperature or warm briefly in a low oven.
- Scaling & pan swaps
- To make thinner bars, use a 9×13″ pan and reduce baking time. Keep a close eye; thinner batter bakes faster.
Nutrition
- Serving Size: 1 serving
- Calories: 299kcal
- Sugar: 21g
- Sodium: 105mg
- Fat: 18g
- Carbohydrates: 32g
- Fiber: 1g
- Protein: 4g
- Cholesterol: 61mg