Healthy Homemade Butterfingers: the freezer candy bar that actually lives up to the craving
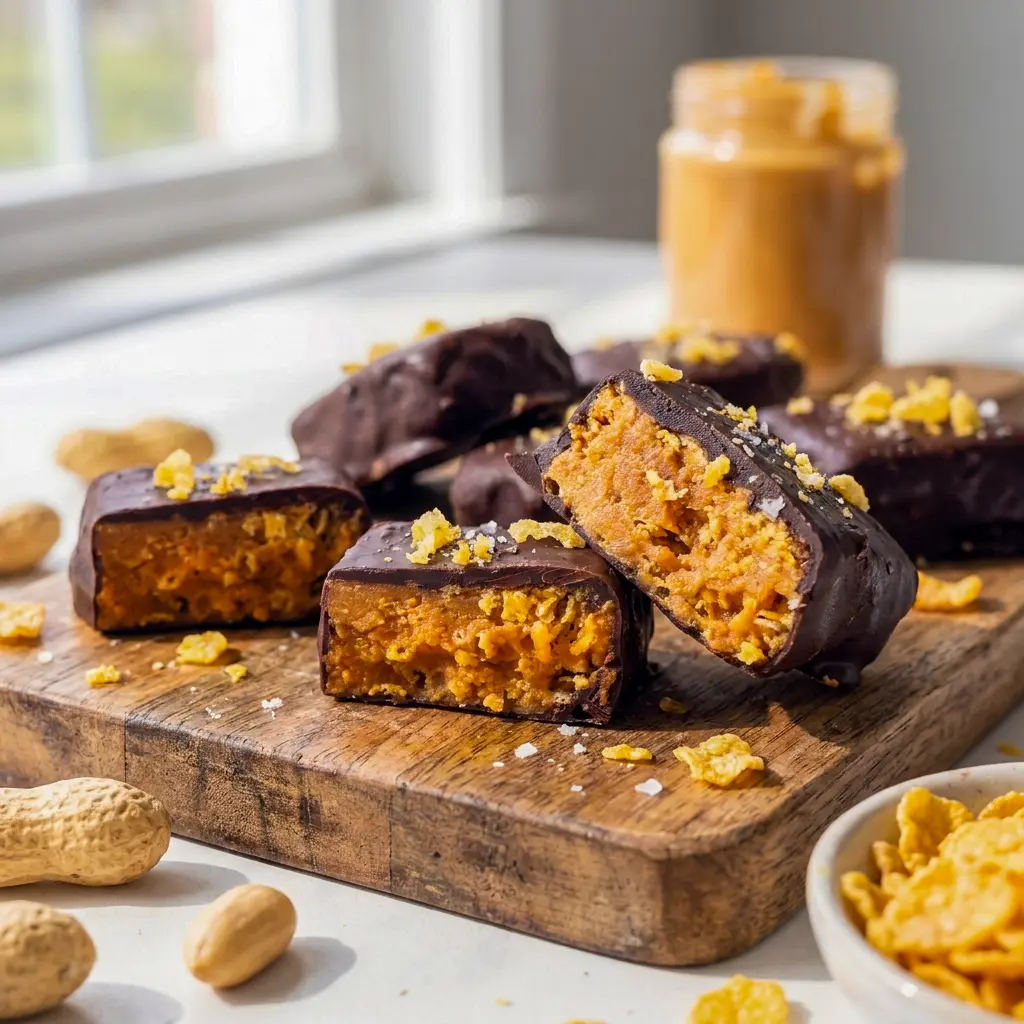
Healthy Homemade Butterfingers hit that rare sweet spot where a nostalgic candy bar gets a cleaner ingredient list without losing the fun. Crunchy, chocolate-coated, peanut buttery, and freezer-ready, they bring back that classic candy-bar feeling in a way that feels a lot better for everyday snacking. Healthy Homemade Butterfingers are exactly the kind of treat that makes a freezer feel more useful.
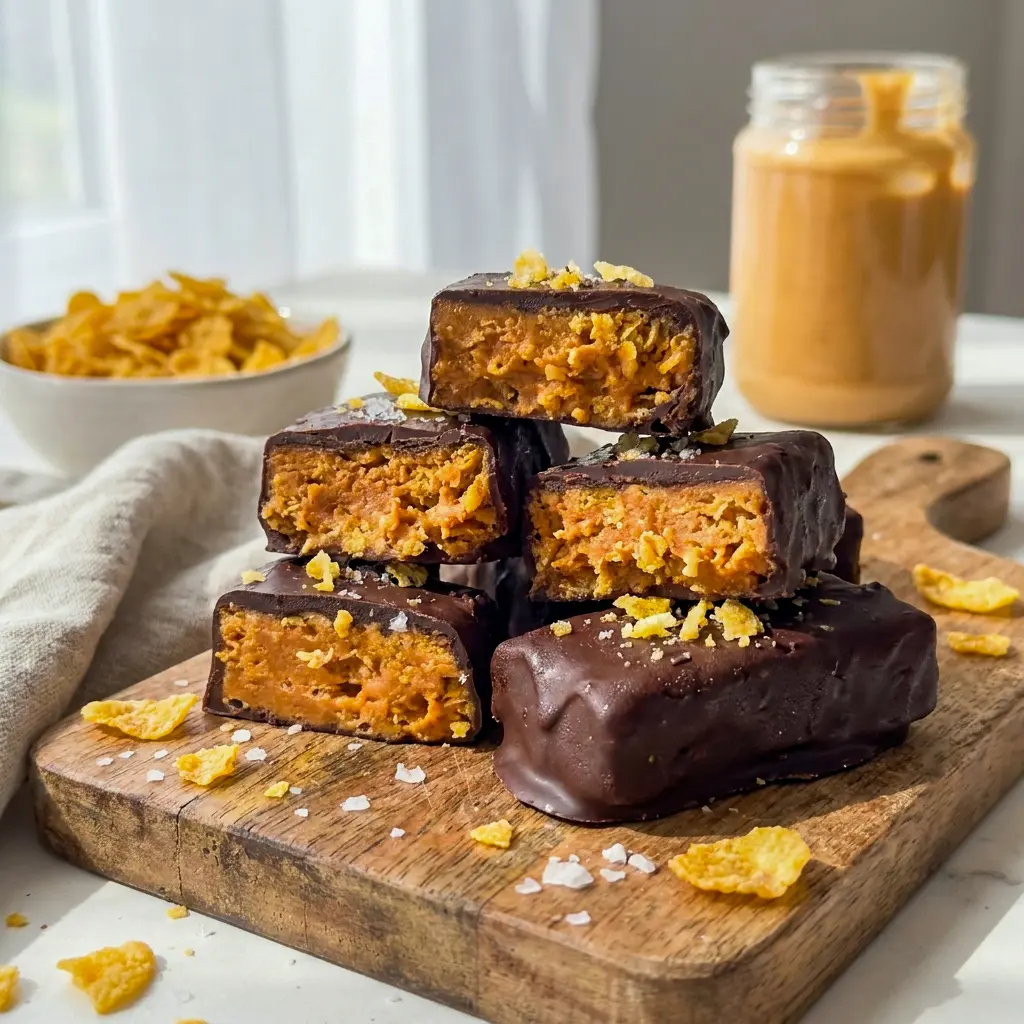
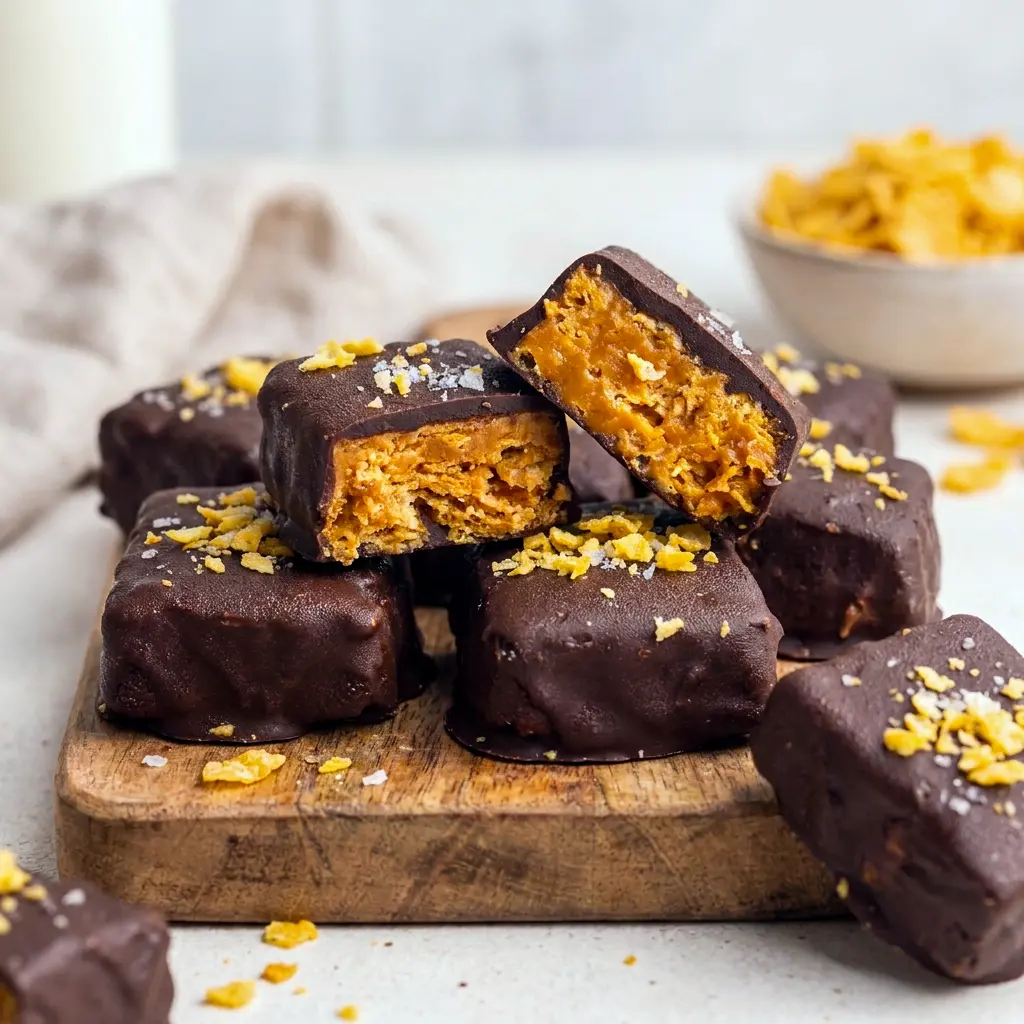
The first bite tells you everything. You get crisp cereal, rich peanut butter, a sweet binder, and a smooth chocolate shell. That combination makes Healthy Homemade Butterfingers taste familiar, but not heavy. They feel like dessert, snack, and tiny reward all at once.
That is what makes this recipe so useful. Healthy Homemade Butterfingers are simple enough for a weekday, but satisfying enough to satisfy a real candy craving. They fit beautifully into a lineup of Homemade Organic Snacks, especially when you want something sweet that still feels intentional.
They also fit the vibe of Diy Healthy Candy without requiring a candy thermometer or complicated technique. You mix, press, chill, dip, and freeze. That is it. The simplicity makes Healthy Homemade Butterfingers one of those recipes you keep around because it works when you need it.
There is also a nice bonus here: you control the ingredients. That means Healthy Homemade Butterfingers can lean gluten-free, dairy-free, refined-sugar-free, or even nut-free depending on what you need. They are flexible, practical, and much easier than they look.
Table of Contents
Why you will love Healthy Homemade Butterfingers
Healthy Homemade Butterfingers deliver a lot with very little effort. You only need a few pantry staples, and the method stays easy from start to finish. That makes them a great fit for Homemade Healthy Candy Recipes when you want something that feels like a treat but comes together quickly.
They also hold up well in the freezer, which is a big deal. Healthy Homemade Butterfingers are the kind of candy bars you can make once and enjoy for weeks. That means snack emergencies become a lot less dramatic.
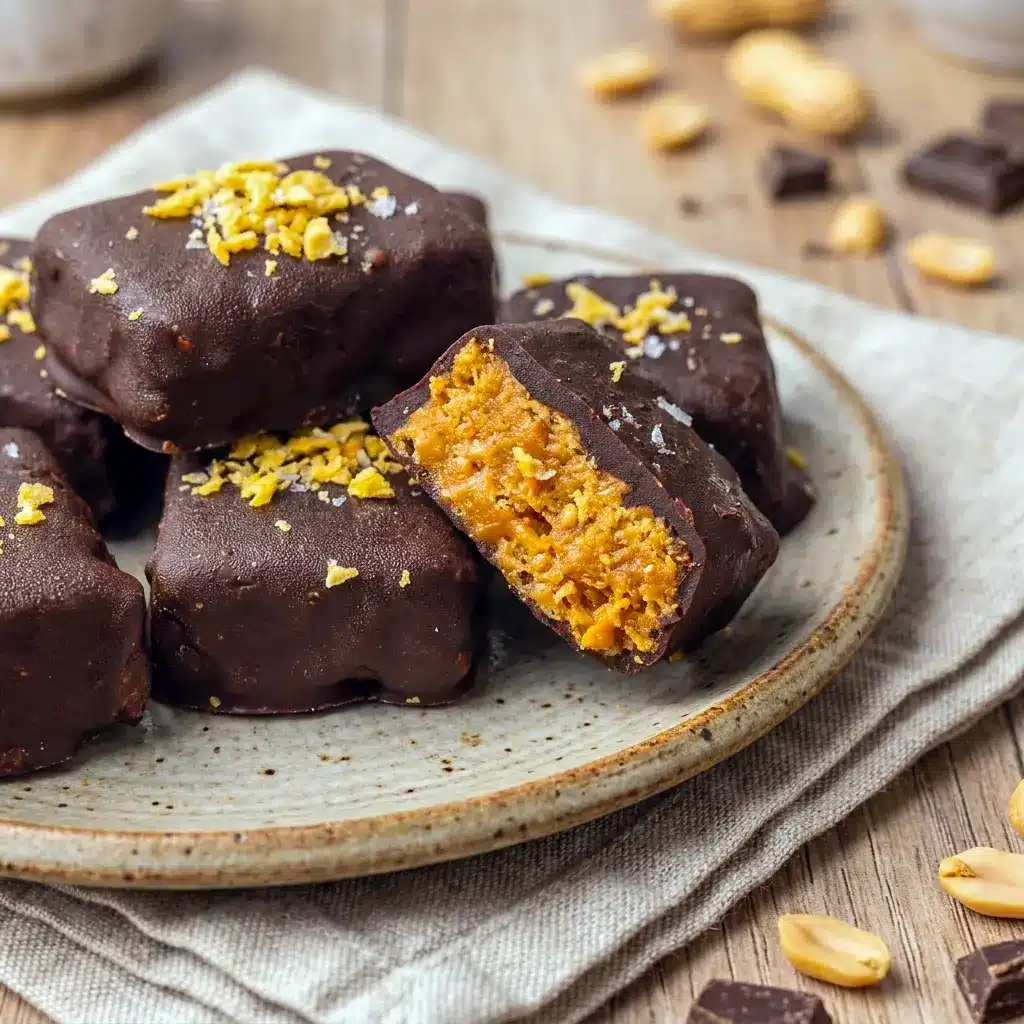
The texture is a major win too. The crushed corn flakes give Healthy Homemade Butterfingers their signature crunch, while the peanut butter and sweetener create the chewy, binding center. Then the chocolate coating adds that candy-bar finish that makes each square feel complete.
They are also a smart alternative to store-bought candy. Healthy Homemade Butterfingers let you enjoy the same flavor profile with ingredients you probably already recognize. That makes them a strong choice for anyone trying to move toward Healthy Homemade Candy without giving up dessert.
And unlike How To Make Healthy Hard Candy, this recipe stays soft enough to bite into comfortably while still feeling crisp and candy-like. That makes Healthy Homemade Butterfingers much easier to love and much easier to serve.
The Key Ingredients (and Why You Need Them)
Below I break down the main ingredients in Healthy Homemade Butterfingers and explain what each one does. The recipe card has the exact measurements, but this section helps you understand the structure and the flavor so you can make smart swaps when needed.
- Peanut butter – This is the creamy base that gives Healthy Homemade Butterfingers their classic nutty flavor and helps hold the filling together.
- Honey or maple syrup – These sweeteners bind the mixture and keep the recipe naturally sweetened. They also help Healthy Homemade Butterfingers stay better-for-you.
- Corn flakes – These create the crisp texture that mimics a candy-bar center. They are essential for the crunch in Healthy Homemade Butterfingers.
- Chocolate chips – The chocolate coating turns the bars into a real candy-style treat and gives them that familiar finish.
- Coconut oil – Coconut oil helps the chocolate melt smoothly and sets the coating with a clean snap.
That small ingredient list is a big reason Healthy Homemade Butterfingers work so well. They belong in the same conversation as Healthy Butter Fingers and Healthy Butterfinger Bars, but they stay easy enough for casual kitchen use.
How to Make It
Making Healthy Homemade Butterfingers is straightforward. The process is really just mix, press, chill, slice, coat, and freeze. The only thing you need to be careful about is keeping the texture crisp and the chocolate smooth.
- Crush the cereal.
Place the corn flakes in a large zip-top bag, seal it well, and crush them into small pieces. You want them broken down, but not pulverized into dust. That texture helps Healthy Homemade Butterfingers keep their crunch. - Mix the filling.
Add the peanut butter and honey or maple syrup to a large bowl. Stir until the mixture looks smooth and combined. Then add the crushed corn flakes and mix again until the cereal is coated evenly. This step is the heart of Healthy Homemade Butterfingers. - Press into the pan.
Line a loaf pan with parchment paper, then transfer the mixture into the pan. Press it down into an even layer. Keep the pressure firm but not aggressive. That helps Healthy Homemade Butterfingers stay compact without becoming dense. - Freeze until firm.
Place the pan in the freezer for at least 1 hour so the mixture hardens enough to slice cleanly. - Slice into bars.
Lift the chilled slab out of the pan and set it on a cutting board. Cut it into 12 bars. Clean cuts make Healthy Homemade Butterfingers easier to dip and better looking when finished. - Melt the chocolate.
Combine the chocolate chips and coconut oil in a bowl. Melt them together, then whisk until smooth and glossy. The coconut oil helps the chocolate coat evenly and gives Healthy Homemade Butterfingers a clean shell. - Dip each bar.
Dip each piece into the melted chocolate until fully coated. Lift it out, let the excess drip away, and set the bar on a parchment-lined plate. - Freeze to set.
Return the bars to the freezer for about 10 minutes, or until the chocolate hardens. That final chill gives Healthy Homemade Butterfingers their finished candy-bar feel. - Enjoy or store.
Eat them right away or stash them in the freezer for later. That is the beauty of Healthy Homemade Butterfingers: they are ready when you are.
Why this work so well
Healthy Homemade Butterfingers work because each layer does its job. The peanut butter gives the filling richness. The sweetener binds everything together. The corn flakes create crunch. The chocolate seals it all in. Nothing feels extra, and nothing gets in the way.
They are also incredibly adaptable. That is one reason Healthy Homemade Butterfingers fit so neatly into Homemade Healthy Candy Recipes and everyday dessert prep. You can keep them classic or tweak them for dietary needs without breaking the structure.
They also scratch the candy-bar itch in a cleaner way. That matters when you want something sweet without committing to a full-bore sugar bomb. Healthy Homemade Butterfingers feel like a dessert that understands balance.
And because they freeze well, they double as a stashable snack. That makes Healthy Homemade Butterfingers especially useful for late-night cravings, lunchbox treats, or quick after-dinner bites.

Pro tips
Crush the cereal evenly. You want small pieces, not powder. Too much dust will make Healthy Homemade Butterfingers dense instead of crisp.
Use natural peanut butter. A peanut butter without added sugar keeps the flavor cleaner and helps the bars stay in the healthy-dessert lane.
Press gently but firmly. The mixture needs shape, but not compression. Overpacking can make Healthy Homemade Butterfingers too hard.
Freeze before slicing. A full chill gives you neater bars and keeps the chocolate from smearing.
Work quickly during dipping. The colder the bars stay, the cleaner the coating sets.
Use parchment paper. It saves a lot of cleanup and helps the bars release cleanly after freezing.
Variations to try
Healthy Homemade Butterfingers can bend to different diets and cravings without much trouble.
Make them vegan by swapping honey for maple syrup and using dairy-free chocolate chips. That keeps Healthy Homemade Butterfingers plant-based while preserving the same texture.
Make them low-carb by choosing a sugar-free chocolate alternative and a lower-carb cereal. You will still get the candy-bar feel, just with a different macro profile.
Make them nut-free by replacing the peanut butter with sunflower seed butter. That version still gives you a creamy base and keeps Healthy Homemade Butterfingers school-safe in many cases.
You can also make the coating darker by using dark chocolate chips instead of semi-sweet. That brings a more intense finish to Healthy Homemade Butterfingers.
If you like extra crunch, add a few chopped nuts on top before the chocolate sets. It changes the bite just enough to make the bars feel new again.
Best ways to serve
Healthy Homemade Butterfingers taste best straight from the freezer after a short rest at room temperature. That tiny bit of thawing softens the center just enough while keeping the chocolate crisp.
They also make excellent snack-box additions. Because Healthy Homemade Butterfingers hold their shape so well, they work for grab-and-go treats, dessert trays, and freezer dessert boards.
Serve them after dinner with coffee or tea for a simple sweet finish. They feel satisfying without being too much.
You can also break them into smaller pieces and use them as a dessert topping. Crumble Healthy Homemade Butterfingers over yogurt, smoothie bowls, or vanilla ice cream for an easy upgrade.
Storage and freezer tips
Store Healthy Homemade Butterfingers in an airtight container in the freezer for up to 3 months. That is the best way to keep the chocolate firm and the filling fresh.
If you want to eat one later, let it sit at room temperature for a few minutes before biting in. That gives Healthy Homemade Butterfingers the best texture.
Stack them with parchment between layers if needed. That prevents sticking and keeps the chocolate coating neat.
FAQs
Can I use a different cereal?
You can, but corn flakes give Healthy Homemade Butterfingers the best classic crunch.
Can I use maple syrup instead of honey?
Yes. Maple syrup works well and makes the recipe vegan-friendly when paired with dairy-free chocolate.
Do I need to temper the chocolate?
No. The freezer sets the chocolate coating quickly, so this recipe stays simple.
Can I make these without coconut oil?
You can, but the chocolate may melt less smoothly. Coconut oil helps Healthy Homemade Butterfingers coat evenly.
Can I make them nut-free?
Yes. Sunflower seed butter works as a strong substitute and keeps the bars school-friendly.
Final thoughts
Healthy Homemade Butterfingers prove that a candy-bar craving does not have to come with a complicated ingredient list. They are crisp, chocolatey, peanut buttery, and freezer-friendly, which makes them a pretty hard treat to beat.
They also belong in any collection of Diy Healthy Candy and snackable dessert ideas. They are simple enough for beginners, flexible enough for different diets, and satisfying enough to feel like the real deal. That is a strong combination for any homemade sweet.
If you are building a stash of Homemade Organic Snacks, looking for better-for-you candy, or just want a dependable freezer dessert, this recipe deserve a spot on your list. They are the kind of recipe you make once and then keep coming back to.
Follow me on Pinterest for daily new recipes.
Healthy Homemade Butterfingers | Healthy Butterfinger Bars Made Easy
These Healthy Homemade Butterfingers are crunchy, chocolate-coated candy bars made with peanut butter, corn flakes, and naturally sweetened filling for a better-for-you treat. They are simple to make, freezer-friendly, and taste like a healthier version of the classic candy bar.
- Prep Time: 5 minutes
- Freezing Time: 1 hour
- Total Time: 1 hour 5 minutes
- Yield: 12 servings 1x
- Category: Dessert
Ingredients
- 1 cup peanut butter
- 1/3 cup maple syrup or honey
- 2 cups corn flakes
- 1 cup chocolate chips
- 2 teaspoons coconut oil
Instructions
- Place the corn flakes in a large zip-top bag. Seal it tightly, then crush the cereal into small pieces. You want the flakes broken down into bite-size bits, not reduced to fine crumbs.
- In a large mixing bowl, combine the peanut butter and maple syrup or honey. Stir until the mixture is smooth and fully blended.
- Add the crushed corn flakes to the bowl and mix again until every piece of cereal is coated in the peanut butter mixture. The dough should look thick, sticky, and evenly combined.
- Line a loaf pan with parchment paper, then press the mixture into the pan. Spread it out into an even layer and press it down firmly enough to hold together, but not so hard that you compact it too much.
- Place the pan in the freezer for at least 1 hour, or until the mixture firms up enough to slice cleanly.
- Lift the chilled slab out of the pan and set it on a cutting board. Slice it into 12 even bars.
- Add the chocolate chips and coconut oil to a microwave-safe bowl or small saucepan. Melt them together, then whisk until the chocolate turns smooth and glossy.
- Dip each bar into the melted chocolate until completely coated. Let any extra chocolate drip off, then place the bar on a parchment-lined plate.
- Repeat with all the bars. Once coated, transfer the bars back to the freezer for about 10 minutes, or until the chocolate shell hardens.
- Serve immediately or store in the freezer until ready to enjoy.
Notes
- Storage: Keep the bars in an airtight container in the freezer for up to 3 months.
- Best texture: Let the bars sit at room temperature for a few minutes before eating so the center softens slightly.
- Diet swaps: Use maple syrup for a vegan version, sugar-free chocolate for low carb, or sunflower seed butter for a nut-free variation.
Nutrition
- Calories: 241kcal
- Sugar: 12g
- Fat: 15g
- Carbohydrates: 22g
- Protein: 6g