A little cupcake that tastes like a Hawaiian memory
The first bite of Mini Hawaiian Guava Cake does something a little sneaky. It does not just taste good. It pulls you somewhere else.
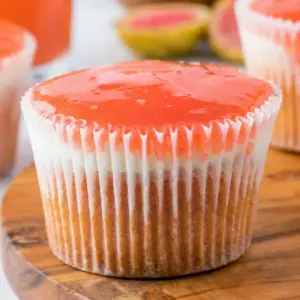
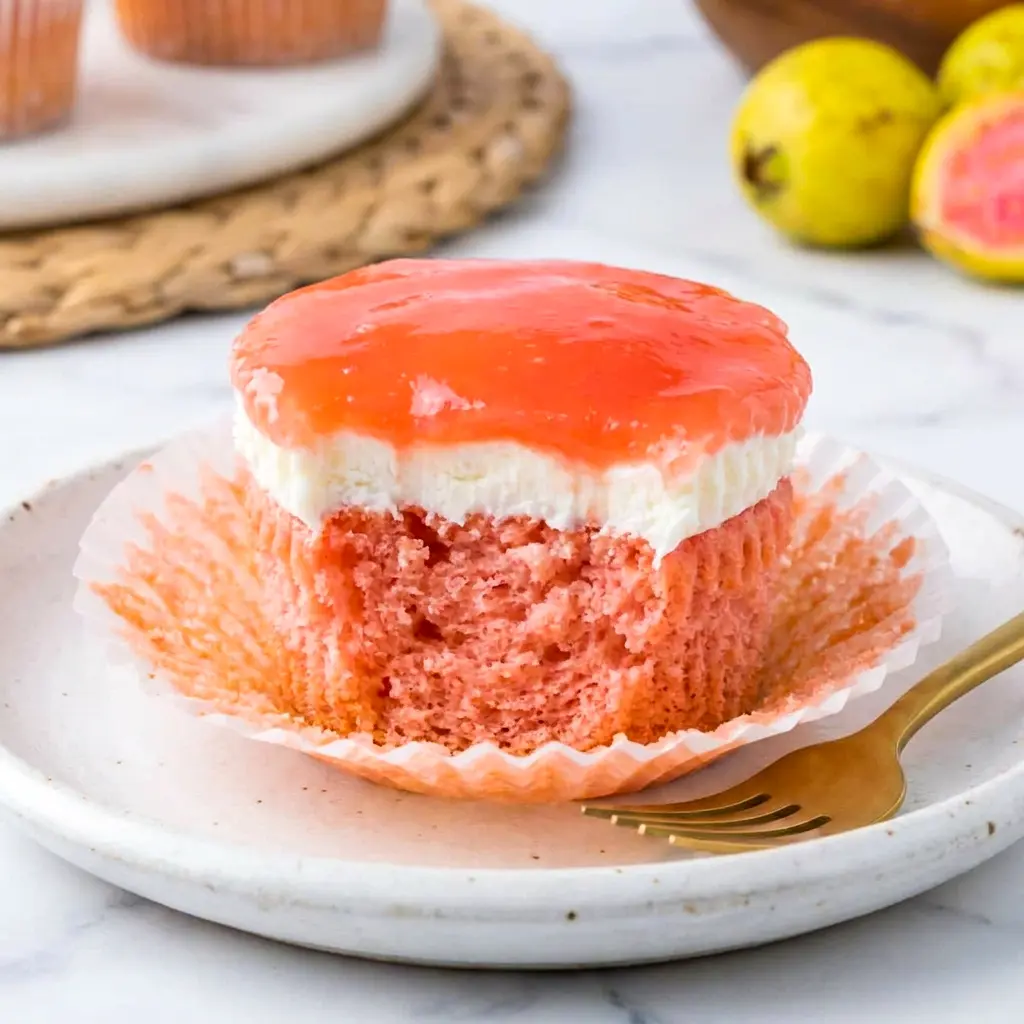
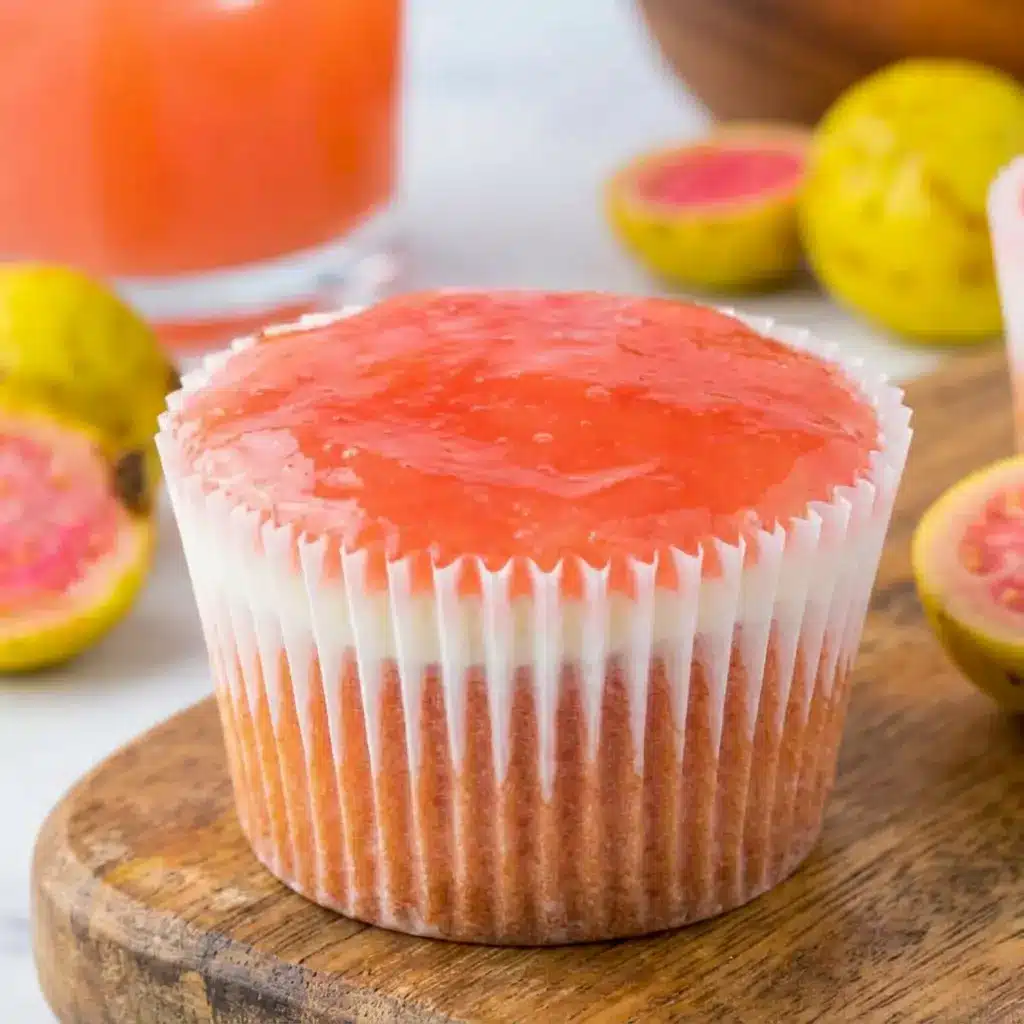
Straight to bright mornings, warm breezes, and dessert tables that somehow always felt more exciting in Hawaii. That glossy guava layer hits first. Then the soft strawberry sponge shows up. Then the cream cheese frosting cools everything down in the best way possible. Suddenly, one tiny cake carries the whole mood.
That is what makes Mini Hawaiian Guava Cake so special.
It delivers the nostalgic flavor of a classic island dessert in a format that feels easy, playful, and party-ready. You get all the charm of traditional Hawaiian Guava Cake, but without needing a sheet pan or a big slice cutter or the social pressure of “who got the biggest piece.” These mini cakes bring the same flavor story in a much more convenient package.
And honestly, convenience matters. Mini Hawaiian Guava Cake works beautifully for potlucks, birthdays, showers, summer gatherings, and random Tuesday nights when you need something that tastes like sunshine. It also fits right into the world of How To Make Guava Cupcakes searches because the process feels approachable even if you are not the type to bake from scratch every weekend.
That is part of the charm. This dessert feels special without being difficult.
Table of Contents
Why you will love this Mini Hawaiian Guava Cake
There are plenty of reasons this recipe keeps winning people over.
- First, Mini Hawaiian Guava Cake tastes bold and tropical. The guava brings sweetness with personality. The strawberry sponge adds a soft fruity base. The cream cheese frosting balances everything with a cool, tangy finish. Every layer has a job, and every layer pulls it off.
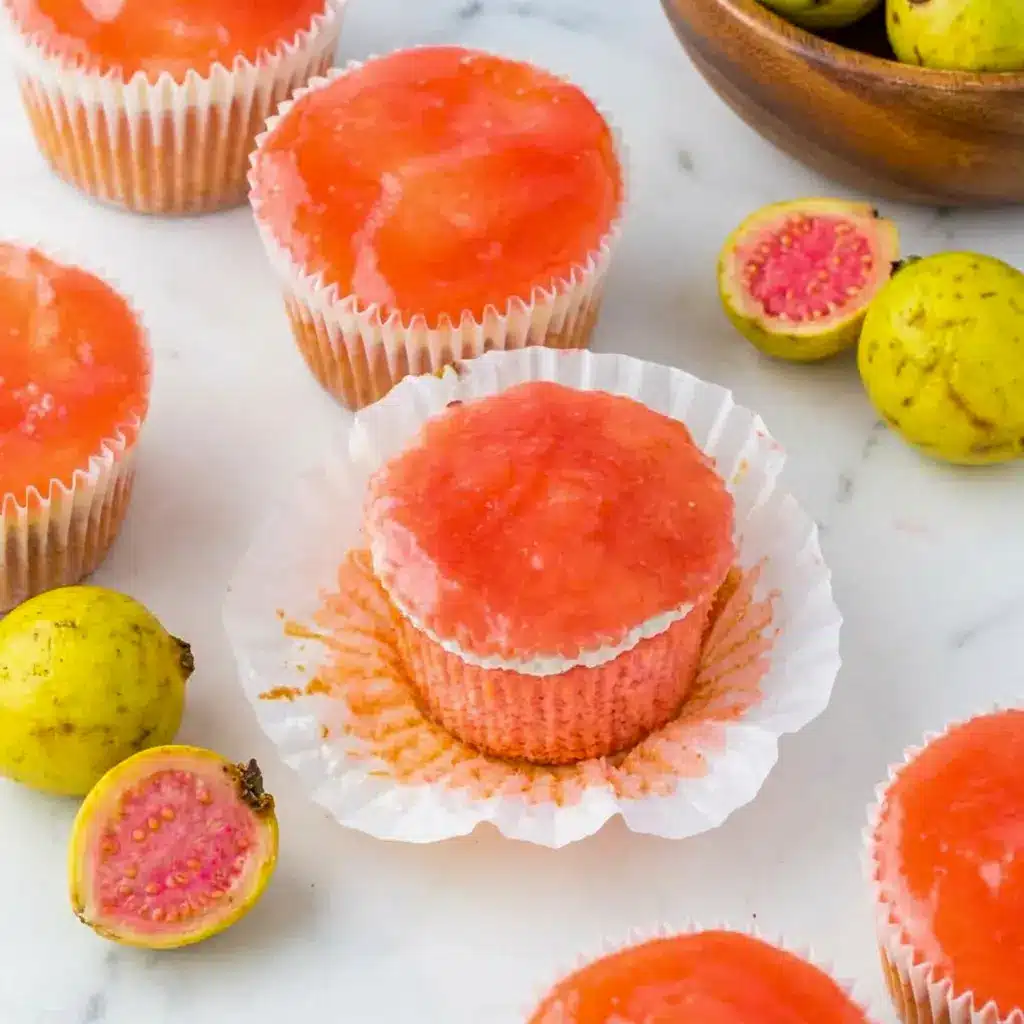
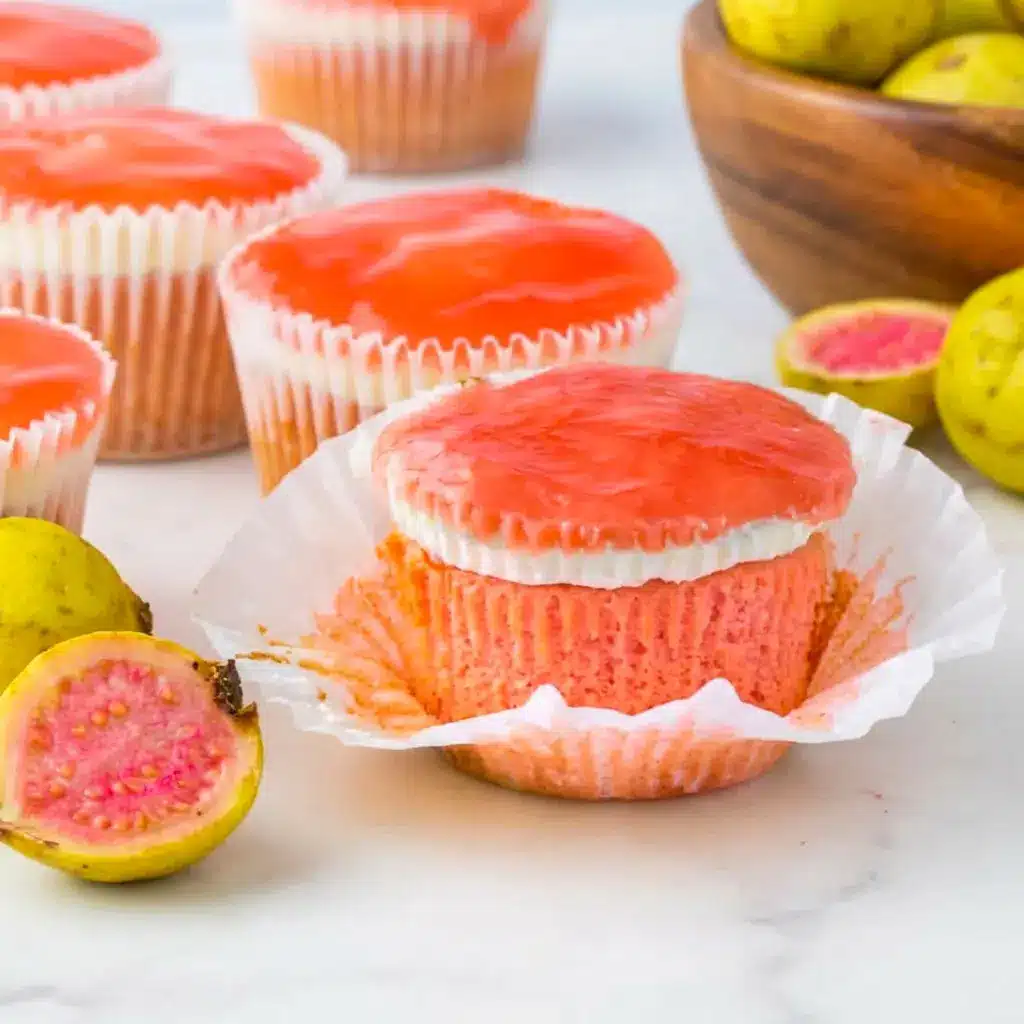
- Second, the color alone makes people curious. That pink sponge and glossy topping make these Mini Hawaiian Guava Cakes look like they came from a bakery window. They are cheerful, eye-catching, and just plain fun to serve.
- Third, the recipe makes party life easier. Mini desserts travel well. They portion neatly. They do not require slicing or serving drama. That makes Mini Hawaiian Guava Cake a smart move for potlucks, picnics, and dessert tables where people grab things with one hand while balancing a paper plate in the other.
- Fourth, the flavor feels familiar but not boring. The combination of strawberry and guava gives these cakes a tropical twist without scaring anyone off. That makes them a strong choice for people who love Hawaiian Guava Cake Recipe ideas but want something a little more playful.
- Fifth, the frosting situation deserves praise. Some desserts aim for fluffy and end up bland. This one does not. The Guava Frosting or Guava Icing style layer gives the cake richness without making it too heavy, especially when you use whipped topping with cream cheese. That creates a smooth, airy finish that plays beautifully against the fruit glaze.
- And sixth, this recipe feels nostalgic for people who know the original island dessert, but still approachable for anyone discovering it for the first time. That combination is rare. It is why Mini Hawaiian Guava Cake earns repeat status fast.
The Key Ingredients (and Why You Need Them)
Below I break down the key ingredients with short notes on what each one does. No amounts here — the recipe card has those. This section just helps you understand the flavor and texture so you can make smart swaps without losing the magic.
- Strawberry cake mix gives the cakes their soft pink color and fruity backbone. It also speeds things up without sacrificing flavor. The strawberry notes pair beautifully with guava.
- Guava nectar or guava juice brings the tropical flavor that defines Mini Hawaiian Guava Cake. This ingredient shows up in both the batter and the topping, so it creates a consistent guava flavor from top to bottom.
- Eggs help the cupcakes rise and stay fluffy. Room temperature eggs mix more smoothly and help the batter come together evenly.
- Coconut oil gives the cake moisture and a gentle tropical note. It supports the chiffon-style texture that makes this dessert feel light instead of dense.
- Cream cheese creates the rich middle layer. It adds tang and structure and keeps the dessert from tasting too sweet. Without it, Mini Hawaiian Guava Cake would lose some of its balance.
- Sugar sweetens the frosting and glaze without overpowering the fruit flavor.
- Vanilla extract rounds out the frosting and makes it taste fuller.
- Cool Whip gives the frosting its light, creamy texture. It keeps the layer fluffy and easy to spread. If you prefer, whipped cream works too, but Cool Whip gives a very stable finish.
- Cornstarch thickens the guava topping so it turns into a glossy gel instead of a runny syrup.
- Water helps create the cornstarch slurry for the glaze.
- Sweetened coconut flakes add a little crunch and a lovely tropical finish if you want garnish.
This ingredient list is what makes Mini Hawaiian Guava Cake feel like a fresh twist on Hawaiian Guava Cake while still keeping the original spirit intact.
How to Make It
This Mini Hawaiian Guava Cake recipe comes together in three simple parts: the cake, the frosting, and the guava gel. Each one is straightforward, but timing matters.
1. Make the guava gel first
Start with the topping so it has time to cool and thicken.
Pour the guava juice into a saucepan and add the sugar. Set it over medium heat and bring it to a boil.
In a small bowl, mix the cornstarch and water until smooth. This step matters because cornstarch needs to dissolve evenly before it hits the hot liquid.
Once the juice boils, remove the pan from the heat and whisk in the cornstarch slurry. Then return the pan to the stove and boil it again for about one minute, stirring as it thickens.
You want the mixture to become glossy and thick enough to coat the back of a spoon.
Transfer the gel to a bowl and refrigerate it while you bake the cakes. This gives it a chance to set properly. If the glaze stays too thin, it will slide right off the cupcakes later, and that is not the grand tropical entrance you want.
2. Bake the cupcakes
Preheat the oven to 350°F and line your cupcake pan with liners.
In a mixing bowl, combine the cake mix, guava juice, eggs, and coconut oil. Start on low speed for about 30 seconds, then scrape the bowl well. Mix again on medium for about 2 minutes until the batter looks smooth and even.
Do not overmix. That is the fastest way to lose the soft texture you want.
Fill the liners only about one-third full. These cakes rise, and you need room for the frosting and topping later.
Bake for 19 to 22 minutes, or until the tops look lightly golden and a toothpick inserted in the center comes out clean or with just a few moist crumbs.
Move the cupcakes to a wire rack and let them cool completely.
3. Make the frosting
Beat the cream cheese until it turns fluffy and smooth.
Add the sugar and vanilla, then mix again until combined.
Slowly fold in the Cool Whip until the frosting becomes light and creamy. Try not to overmix here. You want Guava Frosting that stays airy, not something heavy enough to start its own weather system.
Refrigerate the frosting until the cupcakes are ready.
4. Assemble the cakes
Once the cupcakes are fully cool, spread the cream cheese mixture over the tops.
Then chill them again so the frosting sets a little before the glaze goes on. That helps with clean layers and better presentation.
Spoon or pipe the cooled guava gel over each cupcake. You can spread it gently or let it sit in a glossy pool on top.
Refrigerate the finished Mini Hawaiian Guava Cake cupcakes until serving time.
If you want to add coconut flakes, do it right before serving so they stay a little crisp.
Pro tips for perfect results
A few small details make a big difference here.
- Make the guava gel first. It needs time to cool and thicken, so start there. That one move saves time later.
- Do not overfill the cupcake liners. One-third full is the sweet spot. Any more and you risk overflow. And nobody wants a cupcake that tries to become a muffin by force.
- Use room temperature cream cheese. Cold cream cheese leaves lumps behind, and lumps are not welcome in Guava Icing or frosting.
- Fold the Cool Whip gently. That keeps the frosting light and fluffy.
- Chill between layers if needed. A quick chill helps the frosting set before you add the guava topping.
- Serve them cold. Mini Hawaiian Guava Cake tastes best when chilled. The frosting firms up, the guava layer shines, and the flavors taste brighter.
- Add a little extra guava syrup if you want stronger fruit flavor. Brush it lightly over the cakes after baking if you want more punch.
- Use a piping bag for the gel if you want a polished look. A spoon works fine too, but a piping bag makes the tops look neat.
These tips also help if you are exploring Moist Vanilla Guava Cupcakes or other tropical cupcake variations. The structure stays the same; the flavor just shifts a little.
Variations to try
This recipe already feels playful, but there are plenty of ways to change it up.
- Swap the strawberry cake mix for white or yellow cake mix if you want a more neutral base. That gives the guava flavor more room to stand out.
- Use an angel food cake mix with guava juice instead of water for a lighter, more traditional chiffon-style result.
- Try different fruit glazes. Passion fruit, mango, or strawberry all work if you want a twist on the classic. That is how you can wander into Tropical Passion Fruit Cupcakes territory without losing the island vibe.
- Add lime zest or pineapple juice to the frosting for a more tropical finish.
- Use whipped cream instead of Cool Whip if you want a softer, more homemade texture.
- Add a drop or two of pink food coloring if you want a brighter pink finish. The natural color from the guava and strawberry usually does a lot already, but a boost never hurts.
- Top with sliced strawberries, toasted coconut, or extra frosting swirls if you want a fancier presentation.
- Turn the recipe into a layered cake if you feel ambitious. It will take more batter and a longer bake time, but the flavor profile works beautifully in a round-pan format too.
And if you really want to have fun with presentation, this recipe can even lean toward Colorful Volcano-themed Cupcakes with a dramatic guava glaze on top. The shape and colors already do half the work.
Best ways to serve
Mini Hawaiian Guava Cake works best when served chilled, and that makes it especially handy for warm weather gatherings.
Bring them to potlucks, picnics, birthday parties, shower tables, or summer BBQs. They transport well and look beautiful on a platter.
Serve them after a tropical meal or alongside fruit salad for a more island-style dessert spread.
Pair them with mango or pineapple drinks for a full vacation mood. That keeps the whole table in the same flavor family.
These also make a lovely dessert for people who enjoy Hawaiian Guava Cake but want a more personal, handheld portion. No slicing. No serving knife. No leftovers stuck in the pan because everyone was too polite to take the last square.
That convenience is part of the charm. Mini Hawaiian Guava Cakes feel festive but easy.
Storage and leftovers
These mini cakes store well if you keep them chilled.
Store finished cupcakes in an airtight container in the refrigerator for up to 3 days.
If you want to freeze them, bake the cupcakes first but leave off the frosting and guava gel. Wrap the cooled cakes tightly and freeze them for up to 3 months.
When you are ready to use them, thaw the cakes in the fridge overnight. Then let them sit at room temperature while you make the topping and frosting.
Assemble after thawing, then chill again before serving.
That process makes Mini Hawaiian Guava Cake a great make-ahead option for events and busy weeks.
FAQs
What is Hawaiian Guava Cake?
It is a beloved Hawaiian dessert made famous by the guava, cream cheese, and pink cake combination. The classic version usually comes as a sheet cake, but Mini Hawaiian Guava Cake gives you the same flavor in cupcake form.
Can I make these ahead of time?
Yes. In fact, this recipe works very well ahead of time. Bake the cakes one day, then frost and glaze them the next.
Can I use guava nectar instead of guava juice?
Absolutely. Either one works. You can also use guava puree or guava concentrate if that is what you can find.
What if I cannot find guava juice?
Check the Hispanic or international foods section, or order it online. A guava-strawberry blend or passion fruit-guava blend can also work in a pinch.
Can I use butter instead of coconut oil?
I would not recommend it. The oil helps create the lighter chiffon-like texture that makes Mini Hawaiian Guava Cake work so well.
Can I make the frosting without Cool Whip?
Yes. Whipped cream beaten to stiff peaks can stand in for Cool Whip. It gives you a slightly different texture, but it still works.
Can I make them more guava-forward?
Definitely. Brush the baked cupcakes with extra guava syrup before frosting, or stir a little guava jam into the frosting for extra flavor.
Final thoughts
Mini Hawaiian Guava Cake brings a little island joy into cupcake form.
It keeps the soul of the original Hawaiian Guava Cake but makes it easier to serve, easier to transport, and easier to love in a crowd. The strawberry sponge, creamy frosting, and glossy guava layer create a dessert that feels nostalgic and fresh at the same time.
That is a tough balance to beat.
This recipe fits parties, potlucks, birthdays, and any moment when you want dessert to feel a little special. It also satisfies people who search for Hawaiian Guava Cake Recipe ideas but want a smaller, more practical format.
And that is why Mini Hawaiian Guava Cake keeps earning a spot on dessert tables. It is bright. It is tropical. It is playful. It tastes like a trip to Hawaii without requiring a plane ticket, which is honestly a pretty good dessert strategy.
Follow me on Pinterest for daily new recipes.
Mini Hawaiian Guava Cake Recipe with Strawberry Sponge and Guava Gel
These Mini Hawaiian Guava Cake cupcakes combine strawberry cake, fluffy cream cheese frosting, and a glossy guava topping for a tropical dessert that feels bright, nostalgic, and party-ready. They bring the flavor of classic island cake into a cute, easy-to-serve cupcake form.
- Prep Time: 30 minutes
- Chill Time: 1 hour
- Cook Time: 20 minutes
- Total Time: 1 hour 50 minutes
- Yield: 24 cupcakes 1x
- Category: Dessert
- Cuisine: American
Ingredients
Cakes
- 1 strawberry cake mix
- 1 1/3 cups Guava nectar or guava juice
- 3 Eggs, at room temperature
- 1/3 cups Coconut oil, in liquid form
Guava gel topping
- 2 cups Guava nectar or guava juice
- 1/2 cup Sugar
- 1/4 cup Cornstarch
- 3 tbsp Water
Cream cheese layer
- 6 ounces Cream cheese, softened
- 1/4 cup Sugar
- 1 tsp Vanilla extract
- 6 ounces Cool Whip, thawed
Instructions
- Start with the guava topping.
Pour the guava nectar or juice into a medium saucepan and add the sugar. Set the pan over medium heat and bring the mixture to a boil. While it heats, stir together the cornstarch and water in a small bowl until the mixture looks completely smooth. Once the juice mixture reaches a boil, remove it from the heat and whisk in the cornstarch slurry. Return the pan to the stove and bring it back to a boil. Let it bubble for about 1 minute, stirring as it thickens and turns glossy. When it coats the back of a spoon, take it off the heat and chill it in the refrigerator until set. - Mix the cupcake batter.
Preheat the oven to 350°F and line a cupcake pan with liners. Place the strawberry cake mix, guava juice, eggs, and coconut oil into a large mixer bowl. Mix on low speed for about 30 seconds so the ingredients begin to combine. Stop the mixer and scrape the bowl down well. Then mix again on medium speed for about 2 minutes until the batter becomes smooth and evenly mixed. Be careful not to overmix, or the cupcakes may turn dense. - Fill and bake the cupcakes.
Spoon the batter into the prepared cupcake liners, filling each one about one-third full. Leave room for the batter to rise. Bake for 19 to 22 minutes, or until the tops are lightly golden and a toothpick inserted in the center comes out clean or with a few moist crumbs. Remove the cupcakes from the oven and place them on a wire rack to cool completely. - Make the cream cheese layer.
Beat the softened cream cheese in a bowl until it turns light and fluffy. Add the sugar and vanilla extract, then mix until smooth. Slowly fold in the Cool Whip, keeping the texture airy and light. Once the frosting is fully combined, place it in the refrigerator until you are ready to use it. - Assemble the cupcakes.
When the cupcakes are completely cool, spread the cream cheese mixture over the tops of each one. Try to keep the layer even so every cupcake looks neat. Chill the frosted cupcakes until the cream cheese layer firms up. - Add the guava glaze.
Spoon or spread the chilled guava gel over the cream cheese layer on each cupcake. Use as much or as little as you like, depending on how glossy and fruity you want the tops to look. Refrigerate the finished cupcakes until serving time so the layers set properly.
Notes
- Use guava nectar, guava juice, guava puree, or guava concentrate, depending on what you can find.
- These cupcakes taste best chilled.
- For extra guava flavor, brush the cooled cupcakes with a little extra guava syrup before frosting.
- You can garnish with coconut flakes, strawberries, or a little extra frosting if you want a more decorative finish.