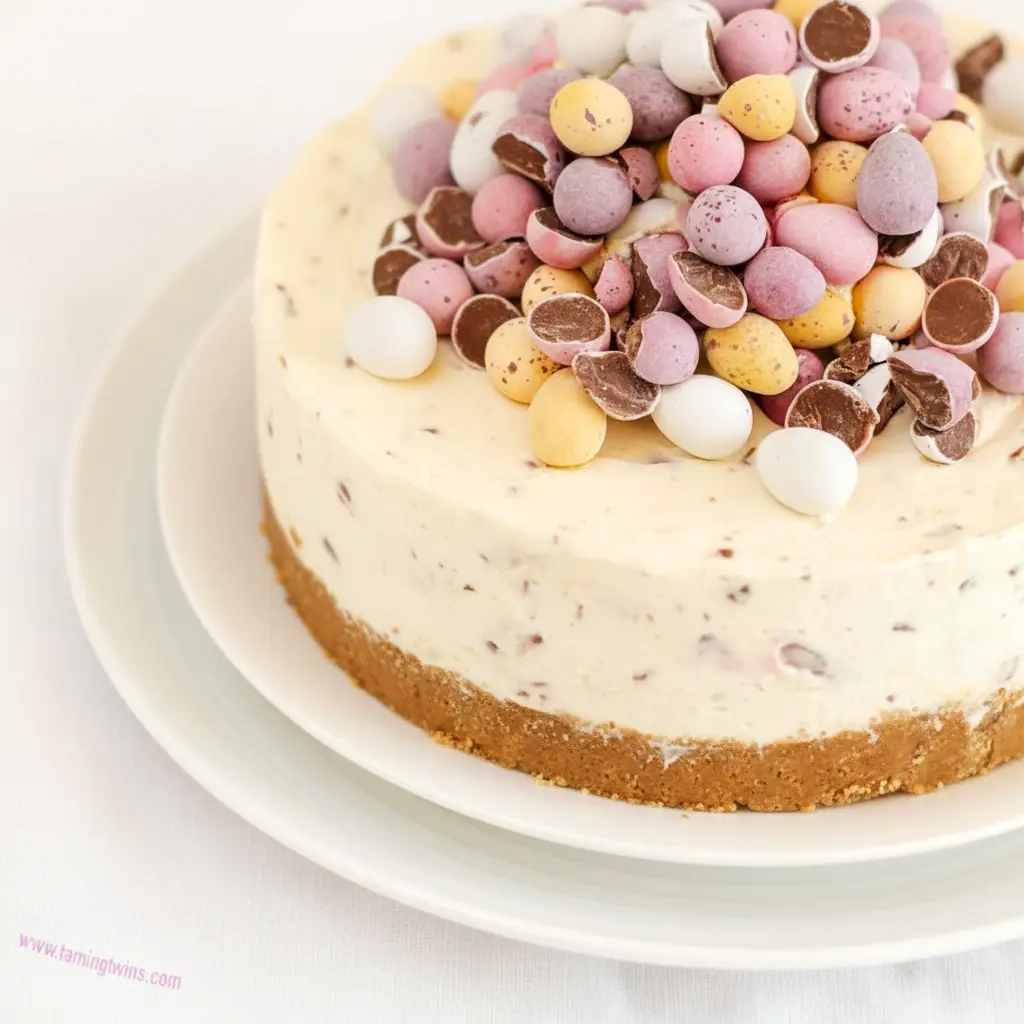
If you want an Easter showstopper that takes zero oven time, this No-Bake Mini Egg Cheesecake is your new best friend. It’s cute, creamy, crumbly, and absolutely party-ready.
Table of Contents
Why you’ll fall head-over-heels for this recipe
Who doesn’t love a dessert that looks like it took effort but actually didn’t? This No-Bake Mini Egg Cheesecake gives you all the cheesecake vibes—silky filling, crunchy base—without firing up the oven. You get pastel-sprinkled Mini Eggs on top, a buttery biscuit base, and a lemony-whipped cream kiss (if you want it). It’s a perfect Mini Egg Cheesecake Idea for Easter brunch, school parties, or whenever you need to impress with minimal stress.
Want a dessert that’s:
- No baking required — meaning less babysitting and more chilling.
- Make-ahead friendly — assemble ahead and look like a hero later.
- Kid-approved — those colorful mini eggs make it irresistible.
Sound good? Let’s break down what makes this dessert work and how to nail it every time.
The Key Ingredients (and Why You Need Them)
Below I explain the main players so you can see exactly what each one contributes and why you shouldn’t skip it.
- Digestive biscuits or graham crackers — These crumbs form the base. They provide texture and a neutral sweetness that lets the filling shine. Crush them fine for a tight crust or leave slightly coarse for a more rustic bite.
- Butter — Melted butter binds the crumbs so the crust holds together when you slice. Use unsalted if you want full control over salt levels.
- Cream cheese — The soul of the cheesecake. Full-fat cream cheese gives richness and stability. Beat it until smooth to avoid lumps.
- Double cream or heavy whipping cream — Whipping cream lightens the filling and gives it that classic cheesecake lift. Whip to soft peaks for the perfect texture.
- Icing (confectioners’) sugar — Sweetens the filling and dissolves easily for a silky finish. Sift it to avoid gritty pockets.
- Lemon (optional) — A little lemon juice brightens the filling and cuts through richness. Add a whisper if you like a fresher profile.
- Cadbury Mini Eggs — For the love of pastel crunch. Use some chopped inside the filling and reserve plenty for decoration. They add texture and festive color.
- Gelatin or stabilizer (optional) — Use only if you need extra structure for warm climates or transport. Most fridge-set no-bake cheesecakes hold fine without it, but a small amount can prevent sagging.
Each of these parts plays a role: the crust gives crunch, the cream cheese brings body, the whipped cream adds lift, and the Mini Eggs bring the fun. Don’t skimp—this balance is what makes the Mini Eggs Cheesecake sing.
How to Make It
Follow this straightforward sequence to build a flawless no-bake cheesecake.
- Crush the biscuits. Pulse in a food processor until you get fine crumbs. No processor? Pop the biscuits in a sturdy zip-top bag and bash with a rolling pin. Reserve a small portion of crumbs or chopped Mini Eggs for the topping.
- Make the crust. Stir melted butter into the crumbs until the mixture clumps. Press it into the base of a springform tin or a removable-base tin. Press evenly—don’t compact it to stone; you want clean slices later. Chill the crust in the fridge while you make the filling.
- Whip the cream. Whip the double cream to soft peaks—stiff peaks will make the filling dense, and under-whipped cream will give you a floppy cheesecake. Aim for that perfect soft, slightly billowy texture.
- Beat the cream cheese. In a separate bowl, beat the softened cream cheese until smooth. Add the sifted icing sugar and a splash of lemon if using. Scrape the bowl so no lumps hide in the corners.
- Fold it together. Gently fold the whipped cream into the cream cheese mixture in two batches. Keep the motion light to preserve air. At this stage, stir in chopped Mini Eggs if you want candy pockets inside the filling.
- Assemble. Spoon the filling over the chilled crust, smooth the top, and return the tin to the fridge. Chill the cake for a minimum of 4 hours—overnight is best. The longer it rests, the cleaner it slices and the better the flavors marry.
- Decorate. Right before serving, top the cake with the remaining Cadbury Mini Eggs and the reserved crumbs. Don’t decorate too early; candy may sweat and sink if left too long.
That’s it. No oven, minimal fuss, maximum cuteness.
Pro tips for perfect results
- Use room-temperature cream cheese. Cold cream cheese lumps and wrecks the vibe. Let it sit out 30–60 minutes.
- Whip cream correctly. Watch the cream. Soft peaks give the best texture—think scoopable, not rock-solid.
- Sift the icing sugar. I know this feels fussy, but it smooths the filling and prevents grainy spots. Big tip: don’t skip this.
- Chill fully. Resist the urge to slice early. A rushed set will lead to a droopy center. Chill at least 4 hours, preferably overnight.
- If your filling seems too loose, pop the cake in the freezer for 20–30 minutes then return to the fridge—this firms things up fast.
- For travel: secure the cheesecake on a flat tray and keep it cool. If you’ll move it long distances, use a small amount of gelatin or keep it super-chilled until the last minute.
- Knife hack: run a sharp knife under hot water, dry it, and slice clean pieces. Wipe the blade between cuts for photo-perfect squares.
Variations to try
This recipe is a great platform—here are easy riffs that all work beautifully.
- Mini Egg No-Bake Cheesecake in jars — assemble base, filling, and crumbs in individual jars for adorable single portions. Great for parties.
- Chocolate-happy — add a layer of melted milk chocolate over the crust before adding the filling for a thin chocolate cap. Let it set.
- Lemon-lovely — fold in a teaspoon of lemon zest and a tablespoon of juice for a bright Mini Egg Cheesecake with a citrus kick.
- Nutty crust — swap some biscuits for ground toasted almonds for a nutty crunch.
- Mini Egg Cookie Butter twist — swirl in some cookie butter to the filling for a decadent spin.
- Minieggs Cheesecake Baked — if you insist on baking, try a baked mini cheesecake with the same flavors—bake at low temp until just set and cool thoroughly. It’s a different texture but delicious.
Best ways to serve
- Slice and plate with a couple extra Mini Eggs perched on top for drama.
- Add a drizzle of warm chocolate sauce if you want a gooey element.
- Serve with fresh berries to cut the sweetness—the tartness balances the candy.
- For a buffet, pre-slice and chill for easy grab-and-go.
Pro plating tip: let the cake sit at room temperature 10 minutes before serving for the softest mouthfeel.
Quick storage & leftovers guide
- Fridge: cover and refrigerate up to 3 days. Keep the topping separate if you can.
- Freeze: store undecorated cheesecake in the tin, wrapped tightly, up to 1 month. Thaw in the fridge 24 hours before serving.
- Leftover slices keep well and make a tremendous midnight snack, IMO. Just don’t expect them to last long.
FAQs
Can I make a smaller version in an 8-inch tin?
Yes. Halve the recipe and adjust chilling time—smaller cakes set faster.
Do I need gelatin?
Most fridge-set no-bake cheesecakes hold firm without gelatin if you whip the cream correctly and chill long enough. Add a little gelatin only if you have transport concerns or very warm conditions.
The cream is runny—what went wrong?
You likely under-whipped the cream or used low-fat cream cheese. Whip cream to soft peaks and use full-fat cream cheese. If it’s too late, freeze briefly to firm the cake.
Can I use another candy instead of Mini Eggs?
Sure. Use any small, colorful candy or even chopped chocolate Easter eggs. Keep in mind texture and melt points.
Can I make this gluten free?
Swap in gluten-free biscuits for the crust, and double-check the Mini Eggs are GF. Many varieties are safe, but always read labels.
Why this is a perfect Mini Egg Cheesecake Idea for Easter
This cake nails the holiday vibe: pastel, playful, and shareable. It comes together fast, you can make it ahead, and kids and adults both love it. Whether you call it a No-Bake Mini Egg Cheesecake Recipe or simply your new go-to Easter dessert, it checks every box: looks great, tastes better, and minimizes stress.
Final thoughts — bring on the Mini Eggs
Let’s be honest: one reason this works is that it looks festive. Those tiny colored eggs do half the styling for you. But the real magic lies in texture contrast—the buttery base, the airy yet creamy filling, and the crisp candy shells. Make it for a Sunday family lunch, an Easter potluck, or just because spring makes you want pastel everything.
If you want to keep things extra-easy, this Easy Mini Egg Cheesecake stays true to its name. If you want to flex a little, try the jar version or the lemon option. Either way, you’ll deliver a dessert that’s adorable, indulgent, and shockingly simple to create.
Ready to make one? Grab your biscuits, soften that cream cheese, and prepare for compliments. FYI: you’ll probably get asked for the recipe—so keep a spare copy handy.
Follow me on Pinterest for daily new recipes.
No-Bake Mini Egg Cheesecake Recipe — Easy Easter Dessert

Light, colorful, and totally fuss-free — this no-bake Mini Egg Cheesecake layers a buttery biscuit base with a whipped cream and cream-cheese filling studded with chopped Mini Eggs. Chill, top with candy, slice, and serve: perfect for Easter or any celebration that needs a cute, crowd-pleasing dessert.
- Prep Time: 15 minutes
- Chilling Time: 3 hours
- Total Time: 3 hours 15 minutes
- Yield: 12 servings 1x
- Category: Dessert
Ingredients
- 280 g (10 oz) digestive biscuits (or graham crackers)
- 140 g (5 oz) unsalted butter, melted
- 360 g (13 oz) Cadbury Mini Eggs, chopped (plus about 270 g extra for decorating)
- 600 ml (2½ cups) double cream (heavy cream)
- 140 g (5 oz) icing (confectioners’) sugar, sifted
- 560 g (2 × 280 g tubs / 20 oz) full-fat cream cheese, at room temperature
- Juice from ½ lemon
Instructions
Crush the biscuits until they resemble coarse sand. A food processor makes this quick; a sealed bag and rolling pin work fine too.
Stir the melted butter into the crumbs until evenly moistened. Press the mixture into the base of a 7-inch springform or removable-base tin to form an even layer. Chill briefly while you prepare the filling.
Chop 360 g of Mini Eggs into halves or rough pieces. Set aside the rest for decoration.
Whip the double cream to soft peaks with an electric mixer. Scoop out roughly three dessert spoons of whipped cream and pop them into the fridge — you’ll use these for piping or topping later.
In a large bowl, beat the cream cheese until smooth. Add the sifted icing sugar and lemon juice, then fold in most of the whipped cream until light and airy. Gently fold in the chopped Mini Eggs so they’re distributed through the filling.
Spoon the mixture over the chilled biscuit base and smooth the surface with a spatula or palette knife. Return the tin to the fridge and chill for at least 3 hours, ideally overnight, until set.
To release, run a knife warmed under hot water around the tin edge and lower the sides (or use your removable base method). Top the cheesecake with the reserved whipped cream and pile on the remaining Mini Eggs — some halved for texture and style. Slice and serve.
Notes
- No digestive biscuits? Use graham crackers as a direct substitute.
- Butter: Unsalted is preferred so you control salt levels. Melt briefly in the microwave. (Approx. 1¼ US sticks.)
- Cream cheese: Full-fat Philadelphia blends easiest, but other brands work — just beat thoroughly to remove lumps.
- Cream: Chill it before whipping. In the US, heavy cream equals double cream. Whip until the texture holds but stays soft.
- Removing the cake: Warm a knife under hot water, dry it, then run it around the tin to loosen the edge for a neat removal.
Nutrition
- Calories: 554kcal
- Sugar: 38g
- Sodium: 195mg
- Fat: 41g
- Saturated Fat: 25g
- Carbohydrates: 46g
- Protein: 4g
- Cholesterol: 91mg